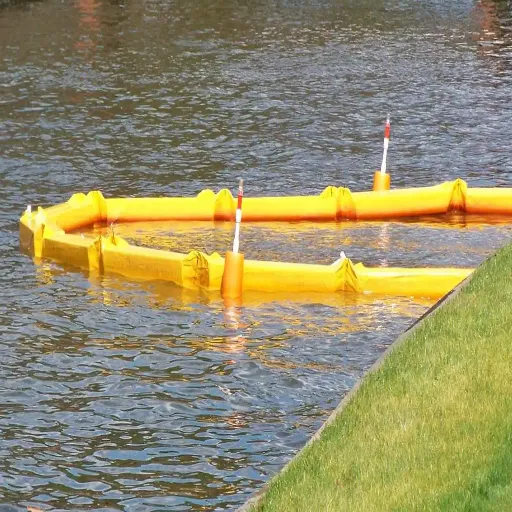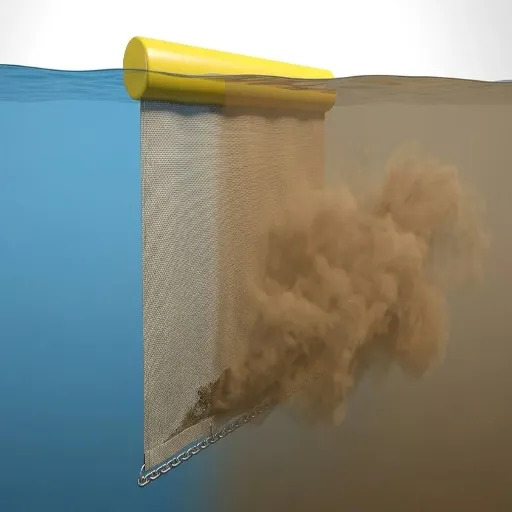
Silt curtain installation starts with approved site inputs, then shoreline assembly, controlled positioning, restraint, skirt release and installed-state inspection. Follow the delivered system’s instructions and the project’s reviewed deployment method at each transition.
A straight line of floats can hide an incomplete joint or a skirt that has not reached its intended position. If your crew is preparing to launch, the useful question is what evidence allows the next step. This guide sets out the sequence, the checks and the handoff record so you can identify unresolved items before sediment-disturbing work begins.
For system context, see the floating silt curtain overview. Here, the focus is installation readiness rather than product comparison or anchor design.
Key Takeaways
- Confirm the layout, conditions window and responsible people before launch.
- Check each required connection while the sections remain accessible on shore.
- Keep the skirt controlled until positioning and restraint checks permit release.
- Record what was inspected, what remains unseen and who accepts the installation.
1. Confirm Silt Curtain Installation Readiness Before Launch

Freeze the approved inputs and responsibilities
Before moving a bundle, identify the drawing and instructions that apply to the delivered curtain. A type label alone does not establish suitability for the measured flow, water depth, debris or exposure. Compare your conditions record with the turbidity curtain type-selection guide before closing the selection handoff.
Indian Valley Industries’ installation sheet explicitly places installation and design with the responsible engineer or governing agency. Its sequence is useful, but its hardware and handling details are product-specific. Obtain the applicable instructions rather than combine convenient details from different systems.
Use the following readiness worksheet as a proposed record. Assign the named person for each role on your project; the role labels are not a universal approval structure.
| Input | Document or observation | Suggested owner | If unresolved |
|---|---|---|---|
| System and layout | Drawing revision, section list, connections and closures | Responsible designer | Resolve mismatches before launch |
| Conditions window | Flow, weather, water level and debris observations | Deployment lead | Compare with approved operating limits |
| Depth reference | Bed information, water-level reference and skirt schedule | Survey/design lead | Confirm the basis for clearance checks |
| Handling and access | Staging surface, route, vessel method and navigation controls | Marine supervisor | Resolve access or control conflicts |
| Work release | Inspection method, acceptance authority and monitoring handoff | Environmental/site lead | Name the release requirements |
Include any project-required permits or environmental controls in that record. Check who can stop the move, who resolves a design change and who authorizes restart. Keep that information accessible to the deployment crew, not only in the procurement file.
Record the launch hold point
A hold point means pause: the named person must confirm readiness before the next step. At launch, record the drawing revision, conditions and open items.
Has the water level changed? Is a part missing? Compare the change with the approved method and ask the named reviewer to resolve it before launch.
The USACE August 2012 pilot report, section 3.0, describes rapid damage after full deployment in South Elizabeth Channel in June 2011. At least 800 linear feet were damaged beyond repair within 24 hours. This is one documented trial, not a general failure rate. Its practical lesson is to check the actual exposure and installed behavior instead of equating deployment with effective containment.
2. Assemble and Inspect the Curtain on a Protected Shoreline
Check each required interface
Lay out sections on a prepared surface that protects the fabric from sharp objects and abrasive ground. Inspect the delivered flotation, fabric, ballast and connection hardware against the section list. Record damaged or missing items before connecting them, with section identifiers that can follow the curtain onto the water.
Separate transport straps from reefing ties. Reefing ties hold the skirt up near the float for handling; opening a shipping bundle does not necessarily mean the skirt should be released. Identify both in the delivered instructions before anyone cuts a line.
The GEI installation guide distinguishes structural connectors, skirt grommet ties and ballast-chain joins on the systems it describes. Some of that hardware is absent from its lighter configuration. Use this distinction to organize checks, without assuming every curtain has the same three interfaces.
| Interface, where specified | What to check on shore | Suggested record |
|---|---|---|
| Structural connection | Correct mating parts and required retaining hardware | Joint ID and close view |
| Skirt closure | Full required connection length, alignment and visible fabric condition | Section pair and inspection note |
| Ballast connection | Required joining hardware and continuity at the section end | Joint ID and hardware reference |
| End or mooring attachment | Connection matches the approved load-transfer detail | Attachment ID and drawing reference |
An apparently closed fabric edge does not establish that the structural connection is complete. Check the required interfaces separately. Do not substitute cable ties, rope or spare hardware unless the applicable instructions permit that specific use.
Illustrative scenario: A crew joins two sections. The skirt edges line up, but the checker finds a missing retaining pin at the structural connector. The crew keeps the assembly on shore and asks the supervisor to resolve the missing part.
The checker records the joint ID, missing part and check still needed. The aligned fabric does not make the connection ready to tow. This example shows why the structural check needs its own record.
Protect the skirt and retain deployment control
Some connections require access to a furled skirt end. The GEI guide allows local release for ballast fastening, followed by retying before towing. Apply that detail only where it matches the delivered system. Confirm that work on one interface has not left a skirt section hanging loose.
Keep completed sections in a protected staging area. Review their identifiers and orientation against the assembly drawing, including any special ends or access arrangements. The launch handoff should identify which joints were checked and which remain open. Avoid a single tick labelled assembled when the underlying checks are incomplete.
3. Move the Furled Curtain Into Its Planned Position

Confirm the handling method and route
Before transfer, confirm the approved handling attachment, equipment, communication method and route to the planned position. Know how the crew will maintain control if movement must stop. Vessel operations, staffing and safety controls belong in the site method; this sequence does not prescribe a towing maneuver.
The GEI guide warns that towing an unfurled curtain from land into water can cause tearing and damage. Its shoreline protection and reefing instructions explain why preparation continues through the move. Do not treat a fabric edge, ballast chain or convenient float fitting as an approved towing point without the system detail.
Check the transfer surface for snag hazards and use the protection specified by the handling method. Keep enough control to prevent sections from dragging across obstacles. Observe the curtain as it enters the water, particularly previously joined ends and any part that catches or begins to open.
Use the operating limits in the reviewed method. A generic tow speed from another manufacturer cannot establish a safe speed for this curtain, tow arrangement or current. If the delivered instructions and site plan conflict, resolve the conflict before proceeding.
Compare actual position with the drawing
Track the curtain’s orientation and section positions against the layout references. Check the planned clearances to navigation routes, structures, work access and shoreline connections. A marker is a positioning aid; it does not itself confirm that the curtain attachment or mooring is correct.
The turbidity curtain anchoring guide explains the information needed for the mooring handoff. Bring the reviewed attachment positions and assumptions into the deployment record. Installation executes that plan; it should not quietly become an anchor-sizing exercise on the water.
If the curtain cannot reach the planned alignment without an unapproved change, pause at the controlled position allowed by the method. Record the affected section, observed obstruction or condition and responsible reviewer. Do not release the skirt simply to see whether the new layout works. The next stage needs a confirmed arrangement, not an undocumented approximation of the drawing.
4. Secure the Layout Before Releasing the Skirt
Check the restrained layout
Confirm that the required restraint is established before removing reefing ties. IVI’s sequence places anchoring and the specified configuration before furling-line removal. GEI similarly keeps the skirt controlled until the curtain has been towed and anchored into position. These sequences support a release hold point, while the project’s actual connection details remain controlling.
Compare attachment and anchor identifiers with the reviewed layout. Check line routing, the allowance for movement specified by the design, shoreline closures and any managed opening. Ballast holds the skirt down; it does not replace the designed mooring system. Confirm each function against the delivered-system information.
Record any deviation before release. A substituted attachment, different end position or altered opening can change the arrangement being accepted. Ask the responsible reviewer to resolve the deviation and identify any further checks. Do not record the original drawing as the installed layout when it no longer describes the field condition.
Release under the approved procedure and recheck geometry
Release the skirt using the applicable manufacturer’s method and the site’s handling controls. Keep control of released lines and collect waste as the procedure requires. Avoid prescribing a universal order for cutting ties: some systems use retrievable furling lines, and the safe access method depends on the actual installation.
Observe the transition as the skirt drops. Check whether a section remains furled, catches on an obstruction, twists or visibly pulls the floating line out of the accepted position. Escalate an abnormal condition through the site method instead of forcing the skirt down or adding unapproved weights.
Before requesting skirt release, use the silt curtain depth guide to check that your handoff includes the water-level and bed references. After release, compare the skirt’s position with the specified depth and clearance. The delivery note’s skirt length alone cannot show where the fabric now hangs.
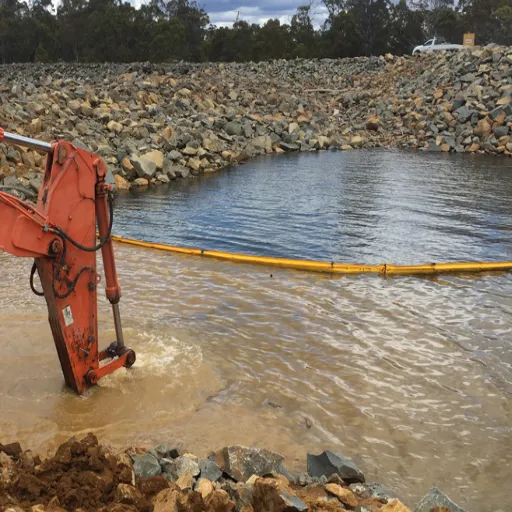
Keep the release time, section range and conditions with the inspection record. A completion photograph can show the surface arrangement at that moment. It cannot by itself demonstrate underwater clearance, continuity or performance during the later works.
5. Verify Silt Curtain Installation Before Releasing the Work Area
Complete the installed-state checklist
Compare the installed curtain with the accepted design and manufacturer requirements. Record the observation method and its limits. The worksheet below proposes fields for that review; it supplies neither acceptance tolerances nor a pre-filled pass result.
| Installed item | Acceptance basis | Method and limitation | Evidence reference | Status |
|---|---|---|---|---|
| Float line and freeboard | Approved arrangement and system instructions | Surface observation; underwater fabric remains unseen | Dated view and section IDs | Record finding |
| Section joints | Applicable connection detail | Accessible close views; note hidden interfaces | Joint record | Record finding |
| Skirt and clearance | Reviewed depth and bed/water-level basis | Approved inspection method; state visibility limits | Survey or inspection record | Record finding |
| Moorings and closures | Approved attachment/layout detail | Inspect accessible parts; identify unverified parts | Attachment IDs and layout | Record finding |
| Access and navigation | Site access-control plan | Walkover or vessel observation within authorized access | Closure/opening record | Record finding |
If diving is restricted, agree an alternative inspection method with the responsible team. A camera or remotely operated vehicle may be considered, but access, visibility and coverage must suit the inspection question. Identify what the view actually establishes. An unclear image of a joint is an unresolved observation, not evidence of an intact connection.
Document acceptance, open items and the monitoring handoff
For each defect or unknown, record the affected location, required action, owner and reinspection requirement. Refer unresolved material defects to the person named in the work-release plan. Close the record with evidence of the correction and recheck, rather than replacing the earlier finding with a clean checkbox.
The Town of The Blue Mountains’ outfall project updates offer a dated example. On July 10, 2026, the Town reported a turbidity alert and a curtain defect that was secured. A July 30 update described approval of an amended construction plan and planned redeployment in a modified configuration.
These are separate project events, not proof that the July 10 defect caused the later redesign. The lesson is to document inspection responses and review changes before restarting, not to copy that site’s geometry.
Installation acceptance and environmental performance are separate checks. The monitoring handoff should identify the project’s baseline requirements, response criteria, responsible people and stop/restart process. Clear-looking water at handover does not demonstrate later compliance, and this installation article sets no universal turbidity threshold.
File the accepted layout revision, installation observations and open-item decisions together. The next shift needs to know what was inspected and which conditions supported the release decision, especially if water level, weather or work access changes.
Frequently Asked Questions
Use these answers with the delivered-system instructions and project requirements. Resolve differences in hardware, conditions or acceptance criteria with the responsible person. Another site’s dimensions or monitoring limits need review before use.
When should the curtain skirt be unfurled?
Release the skirt after positioning and restraint meet the approved method and the release hold point is cleared. IVI and GEI place release after anchoring and positioning. Check any locally opened section has been resecured before transfer. Follow the delivered system’s instructions for handling the release lines.
Can the curtain be installed before the anchoring plan is ready?
Do not improvise a deployment that depends on an unresolved anchoring arrangement. Shoreline inspection and assembly may be possible under an approved staging method, but launch needs the relevant layout and control decisions. Identify who must resolve the missing information, then document that resolution before proceeding to the affected activity.
Does a silt curtain have to touch the bottom?
Use the reviewed skirt depth and clearance requirement for the site. Nominal skirt length does not prove the deployed geometry as water level and flow change. The depth-selection article explains the inputs. Do not add extra fabric or bottom contact as a universal remedy for a perceived containment problem.
How can joints be checked when diving is restricted?
Check accessible interfaces on shore before launch and retain identified connection records. For submerged verification, agree an authorized method with the responsible team. Camera coverage may help where access and visibility permit, but record blind areas and uncertain views. Do not infer complete underwater continuity from surface photographs alone.
Does completing installation mean construction can start?
Construction starts only after the project’s work-release requirements are met. Installation inspection is one input, alongside any required environmental checks, monitoring readiness and approvals. Name the acceptance authority and document open-item decisions. A deployed curtain or signed delivery note does not by itself authorize sediment-disturbing work at the site.
Keep the Deployment Record With the Work Handoff
The useful deliverable is a reviewable installation record, not a launch photograph alone. Keep the layout revision, section and joint identifiers, release observations, inspection limits and acceptance decisions together. Give each unresolved item an owner and a defined route to closure.
Before requesting work release, compare the anchoring handoff inputs and depth record with the installed curtain. Resolve differences with the named responsible person and retain evidence of the recheck. Pass this record to the monitoring team so later inspections start from a documented condition.
Silt curtain installation is complete as a field task only when its required checks and handoff are addressed. Performance during the works still needs the project’s separate monitoring and response process.