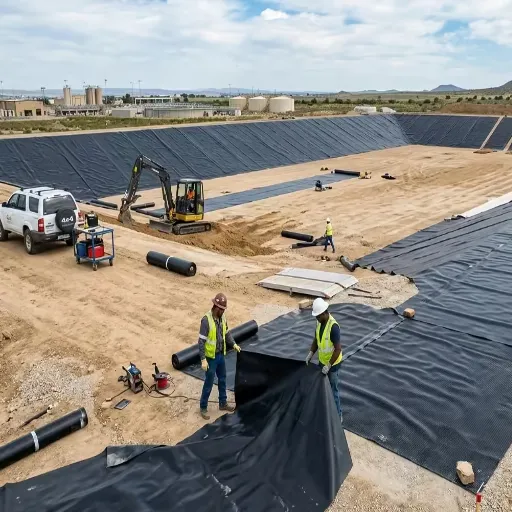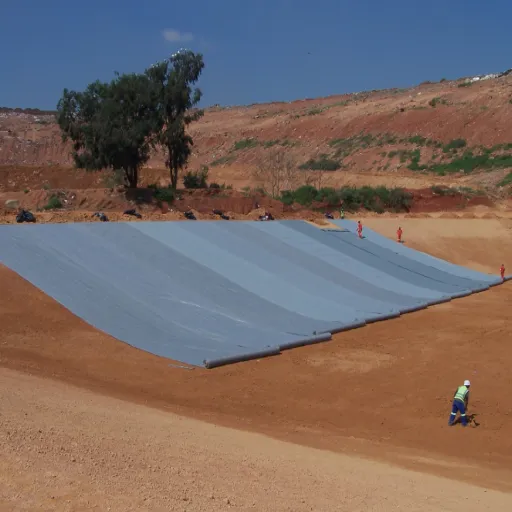
Covered geomembrane leak surveys can locate breaches after soil or water placement. The chosen electrical method must suit the installed system and site conditions. Plan the test window, covered area and repair access together.
An exposed-liner survey describes an earlier construction state. It can’t tell you what happened when cover crews later crossed the area. Before you release a covered cell or fill a pond, check that later state.
This guide helps you turn a survey request into decisions about soil cover, water level, excluded areas and repairs. Start with our geomembrane electrical leak location methods guide if you have not selected an approach.
Key Takeaways
- Define the barrier, covered zones and construction state the survey will assess.
- Treat cover conductivity, contact through a breach and electrical isolation as separate questions.
- Plan how crews will reach suspected defects before covering or filling removes access.
- Record exclusions and agree the repair recheck before releasing the next work stage.
Set the Scope and Timing of Covered Geomembrane Leak Surveys
Define the tested barrier and state
Begin with a cross-section and a zone drawing. Name the geomembrane to be tested. Show the layers above and below it. State whether the survey comes before or after the final cover.
In a double-lined system, saying “test the liner” leaves an important question unanswered: which barrier?
ASTM D7007-24 addresses electrical methods for geomembranes covered with water or earthen materials. Its public scope distinguishes those cover conditions. It doesn’t show that every liner system can be tested in all conditions.
Write the scope in plain terms. For example: “Assess the primary geomembrane beneath the protection layers in the marked cell. Test after cover placement, before the next work release.” List excluded areas and site conditions still to be checked.
Put the survey between the right construction handoffs
Place the survey where its result can inform a real decision. Agree who checks the installed layers and who prepares the zone. Name the person who reviews test capability, along with the person who releases later work. Record these roles in the project quality plan and contract.
Illustrative scenario A: A contractor offers an exposed-stage survey record when a newly soil-covered cell is ready for handover. The owner compares the survey date with the cover-placement record. The earlier result doesn’t prove damage occurred. It also doesn’t assess the later covered state.
What evidence does the owner need now? The team can define that before releasing the cell. A schedule entry should name the state to be tested and the work being held. Add a zone reference so the next crew knows exactly where the hold applies.
This planning issue remains current. In its 18 August 2026 mining discussion, Solmax stresses planning leak checks before cover decisions become fixed. Use that planning lesson. The supplier article is not a project specification and creates no legal deadline.
Plan Soil-Covered Geomembrane Leak Surveys Around the Installed Layers
Cover profile, moisture and contact are separate inputs
A damp surface doesn’t prove that current can pass through a breach. Give the survey team the actual layer details. Include the soil, protection geotextile, drainage composite and any other layers above the barrier. Also identify the conductive layer below it.
Solmax’s technical note on electrical leak location separates cover conductivity from the contact needed for current to pass through a breach. Check the whole system. Wetting the surface alone does not prove that the buried layers suit the test.
Use the following table to organize the site discussion. The decisions remain specific to the installed materials and the selected procedure.
| Installed condition | Evidence to supply | Decision for the survey team |
|---|---|---|
| Different cover materials or depths across a cell | Zone drawing and actual placement records | Whether zones need separate assessment or preparation |
| Protection or drainage layers above the liner | Cross-section and product identification | Whether contact through a possible breach is supported |
| Dry areas or changing weather exposure | Current observations tied to locations | Whether conditioning and another capability check are needed |
| Cover meeting surrounding soil at an edge | Perimeter details and current site photographs | How electrical isolation can be maintained |
| Equipment routes crossing the test area | Traffic plan and timing of remaining work | When the assessed condition could change again |
Name the affected zone beside each row and use the same label on the drawing. “Wet the cell” is too vague. Where is work needed, who will do it, and how will the survey team check the result?
Return to scenario A: suppose the installed profile includes a locally dry protection layer. Mark that zone. Ask the qualified team how it affects the test. Don’t assume a wet surface has solved the issue or that the zone contains a leak.
Reserve access to suspected locations and the test boundary
Plan for measurements and follow-up work. How will crews reach a marked signal? How will they protect the liner and restore the cover? Being able to walk over a location does not mean a crew can reach the liner to repair it.
Keep the agreed test boundary available before later earthworks close it. Do not copy a digging detail from a generic article. Let the design and construction quality assurance team agree the detail with the survey provider.
Review the geomembrane installation sequence when setting this work window. Resolve the sequence before another layer or access road makes the planned test or repair harder to perform.
Plan Water-Covered Surveys Before Filling or Drawdown
Define the water state and reachable footprint
Finding a location under water and reaching it for repair are different tasks. Mark the planned water level on the coverage drawing. Show the floor, wet and dry slopes, sumps and other features. The pond outline alone does not show which areas the survey can assess.
ASTM D7007 distinguishes water-covered and earthen-covered procedures. Discuss the actual water state with the provider. Don’t assume a soil-survey plan will work unchanged in a filled pond.
Illustrative scenario B: A pond is scheduled to fill before anyone has agreed how to reach a suspected liner defect. The team compares testing at the planned water level with changing the filling sequence. A generic depth rule cannot settle that choice.
| Planned condition | Coverage question | Repair and water-management decision |
|---|---|---|
| Pond partly filled | Which floor and slope areas are submerged and assessable? | Can repair access be arranged at this stage? |
| Pond at its intended operating level | Which features can the selected arrangement reach? | What operating interruption or water handling might be needed? |
| Pond undergoing planned drawdown | How will changing water levels affect the surveyed footprint? | Can testing and repair share a controlled work window? |
| Slope or perimeter above the water | Is this area outside the water-covered assessment? | What separate assessment or pending-work designation is needed? |
Agree repair access, water handling and operating constraints
Water depth alone cannot establish survey suitability. Ask the provider which areas the plan can cover and what limits access. The project team must agree safe access and work restrictions. It must also plan any water handling.
Before adding water just for a test, plan the next step if a location needs closer review. Who authorizes a level change? Where can water go? Who coordinates access with the liner repair crew?
These questions don’t mean that every pond must be drained. Name who will approve the water plan before the filling date is fixed.
Use the geomembrane pond liner guide for related material and installation context. Base the survey plan on the actual pond, the provider’s assessment and the owner’s work limits. Keep repair access in view. If crews can take readings but cannot reach a defect, the plan still needs work.
Demonstrate Capability and Mark Coverage Limits
Agree how capability and changed conditions are assessed
Electrical leak location, or ELL, relies on suitable electrical conditions around the barrier. Conductive cover is one input. Current must be able to pass through a breach and return beneath the tested liner. Competing paths also need control.
Conductive backing does not remove every other constraint.
ASTM D8265-26 addresses electrical mapping of leaks in covered geomembranes. Its public scope addresses difficult site conditions and their assessment. Discuss the current edition, and check the project specification.
D7007-24 is not obsolete. A new edition does not change an existing contract by itself.
Ask for evidence that the proposed test can meet the agreed goal under the actual cover conditions. Then agree when to review it again. Changes may include drying cover, a new water level, a disturbed test boundary or more work in a tested zone.
Qualified staff must plan capability checks. If the procedure uses intentional defects, get approval first. Agree how to record and repair them, using ASTM D7909-21a(2025) as the relevant technical reference. Never make informal test holes to complete a checklist.
This guide is a planning aid; the provider and project team determine the field procedure.
Keep tested, excluded and pending areas distinct
Use distinct marks for tested, excluded and pending areas on the coverage drawing. Give each excluded strip or feature a clear location. What action will close it? State that beside the location so the next reviewer can find it.
In scenario B, a slope remaining above the water is not assessed merely because the adjacent floor was surveyed. Mark that slope separately. The quality plan may call for a separate assessment or a later work window.
For construction quality assurance, or CQA, the useful question is: “Which decision can this result support?” A result with no located leaks applies to the assessed area and conditions. It does not resolve an excluded tie-in or prove seam strength. Nor does it guarantee containment after later work.
Keep the coverage drawing and the date or construction state together. If the next crew changes the area, the reviewer can see which earlier evidence still applies. A full report audit is a separate task. Here, keep gaps visible before the next work release.
Coordinate Local Repair, Retesting and Later Work
Separate an indication from a confirmed repair
A signal is not yet a confirmed defect or a repair record. Agree how to mark locations and hand them to the crew for review. Name who controls access, confirms the defect, repairs it and protects the nearby liner.
Use this sequence to connect the work:
- Record the indication and its location within the surveyed zone.
- Arrange controlled access and investigate the suspected defect.
- Document the confirmed condition and any repair performed.
- Complete the specified repair and seam checks.
- Agree and perform the electrical recheck for the affected condition and area.
- Review cover reinstatement and later work before releasing the zone.
Assign an owner and the evidence required at each handoff through the project quality plan. This sequence is an editorial coordination aid, not a quoted ASTM procedure.
Agree the scope after repair and re-covering
Illustrative scenario C: A localized repair is completed beneath a soil cover. What should the recheck cover once the crew restores the access area? The team agrees whether to assess the repair, the disturbed zone or another defined area once the cover is restored. No successful result is assumed.
Link the original signal, confirmed defect, repair record and recheck by location. Record the work stage and date beside each reference. A closed repair ticket alone does not describe the whole cell.
ELL and seam verification answer different questions. Use the geomembrane welding and seam checks guide for adjacent repair context, while following the project’s specified checks. An electrical result does not replace the required assessment of repair workmanship.
Finally, identify remaining activities that could change the assessed state. More cover, traffic or work at a penetration should prompt a review of the affected evidence. Agree the response in the quality plan. Let that review define whether another test is needed and which area it should cover.
Use a Covered-Survey Planning Handoff Sheet
Use this worksheet to bring the post-cover test decisions together. It is an editorial aid, not an ASTM form or field procedure. Give each row an owner, a drawing or record reference, and an open action.
| Planning item | Record for the project review |
|---|---|
| Barrier and covered state | Tested geomembrane, installed layers, zone boundaries and assessment window |
| Soil conditioning or water state | Actual conditions, planned preparation and who confirms suitability |
| Access and exclusions | Measurement reach, repair route, excluded features and their next decision |
| Capability basis | Provider’s demonstration or assessment, limitations and reassessment triggers |
| Repair and recheck window | Investigation owner, repair records, affected-area scope and cover reinstatement |
| Later-work controls | Remaining activities and who reviews changes before release |
For scenario A, the first row would distinguish the earlier exposed record from the later soil-covered state. The remaining rows would identify what is needed to assess that later state. They should not be prefilled with “pass” because an earlier stage was accepted.
If material identification is missing, collect the actual liner and backing documents. Our HDPE geomembrane information page provides material context; project records must establish what was installed. Product identification alone does not approve a survey arrangement.
Share the sheet with the people who handle construction, testing, repairs and release. Keep open actions visible. A named owner can act on a gap; a vague exclusion in a completed checklist may leave it unresolved.
Questions About Testing After Soil or Water Placement
Can a liner be surveyed after soil placement?
Yes, if the installed system supports the chosen method. The provider must check the cover, layers below the liner, electrical contact, isolation and access. Plan the test for the actual covered state. An earlier exposed-liner result does not assess work done later to place the cover.
Must a filled pond be drained before a leak survey?
Not always. Water-covered methods exist, but the system, water state and reachable area affect the choice. Repair access needs its own plan.
Before filling or drawdown, agree the test plan and possible water handling. Neither draining nor testing at the normal operating level suits every pond.
Is wet cover enough to make the survey reliable?
No. Moisture can help the cover conduct current. A damp surface doesn’t prove contact through a breach or a return path below the liner. The team must check these conditions, isolation and test capability together.
Follow site-specific preparation advice; there is no universal watering quantity here.
Does conductive backing remove all site constraints?
No. Conductive backing may help form the test circuit. The team still needs to check how it was installed, its continuity, its connections and its isolation. Cover and access also matter.
Supply the actual product and installation records. A label alone doesn’t prove the system is testable.
Does no leak found mean the whole liner is watertight?
No. Read the result with its tested area, capability, conditions and exclusions. It doesn’t establish the state of untested features or guarantee future performance after later work.
Keep the coverage drawing with the result. That lets the reviewer see which work-release decision the evidence can support.
What should happen after a covered-liner repair?
Record the defect and repair, complete the specified checks, and agree the electrical recheck scope. Include changes caused by access and cover replacement in that discussion. Close the work against the defined state and evidence. A repair ticket alone does not resolve the whole survey zone.
Before the next work release, bring the zone drawing, cover records and repair plan to your project review. Check the handoffs against the installation sequence. For covered geomembrane leak surveys, agree when to test and what the result must support before access changes.