You can install geogrid for a gravel driveway in seven steps: strip and proof-roll the subgrade, add a separator if the soil is clay or silt, build a flat 100 to 150 mm bed of angular stone, roll the grid taut, overlap and pin it, cover with 150 to 200 mm of stone, then compact and restrain the edges. Two people can finish a 50 m² driveway in about two days.
That is the short answer. Most DIY jobs fail on sequence, not on the grid: it gets buried on soft ground, left slack, or covered before anyone checks it.
This guide gives you the tools, a two-day schedule, seven steps with a pass or fail check, and the mistakes that waste a roll. For the design method behind the numbers, see our guide to geogrid for road base.
Key Takeaways
- A 50 m² gravel driveway takes two people about two days: one day to prepare and lay the grid, one day to cover, compact, and finish.
- Keep at least 100 to 150 mm of compacted stone over the grid. The first lift should be 150 to 200 mm loose.
- Overlap seams 300 mm on firm ground, 500 mm on medium soil, and 750 to 900 mm on soft clay or silt. Pull the grid taut before you pin it.
- Geogrid spreads load. It does not fix standing water, a spring, or a failing culvert. Drainage comes first.
What Geogrid Does Under a Gravel Driveway (and Where It Goes)
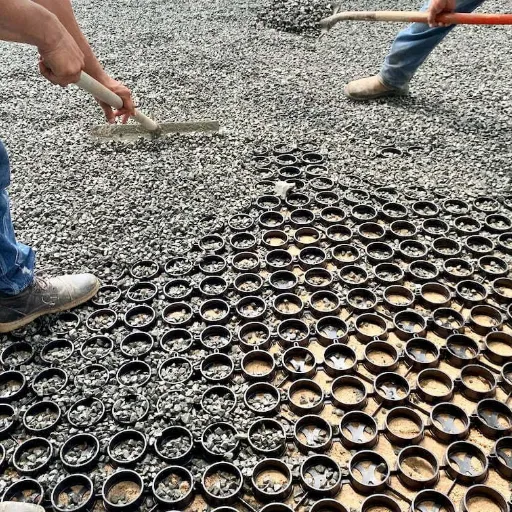
Geogrid is a mesh of polymer ribs that locks into angular stone. When a wheel passes over, the stone tries to spread sideways. The grid holds it in place and spreads the load over a wider area of subgrade. That reduces rutting and lets the base do its job with less stone.
The layer order matters:
- Subgrade. The soil you have, shaped and compacted.
- Separation geotextile. Optional, but required on clay, silt, or wet fine-grained soil.
- Geogrid. At the subgrade and base interface.
- Aggregate base. Angular crushed stone, compacted in lifts.
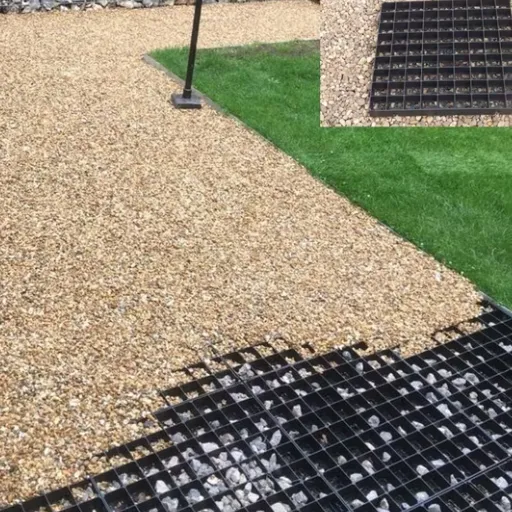
The grid goes at the interface, not on top of the finished driveway. It is also not a gravel grid paver, geocell, or grass grid. Those products confine stone in cells; geogrid reinforces the base layer itself. For manufacturer guidance on how the mesh develops tension, see Tensar’s geogrid installation resources.
If you are still deciding whether it suits your driveway, read geogrid for gravel driveway before you order.
If you would rather have the base checked before you order stone, send us your driveway dimensions and soil type. We will tell you whether you need a separator, a grid, or both.
Geogrid Driveway Installation: Tools, Materials, and Timeline
A driveway is a small construction project. Treat it like one and the installation gets easier.
Tools
| Tool | Buy or rent | Why you need it |
|---|---|---|
| Plate compactor | Rent | Compacting the bed, cover, and edges |
| Vibratory roller | Rent for areas over 150 m² | Faster, more even compaction |
| Wheelbarrow or skid steer | Rent or borrow | Moving stone without driving on the grid |
| Landscaping rake | Buy | Spreading and shaping stone |
| String line and tape | Buy | Checking depth, crown, and square |
| Geogrid cutter or utility knife | Buy | Cutting rolls cleanly |
| Pins, hammer, gloves, eye protection | Buy | Anchoring and handling stone |
Materials
- Geogrid rolls, about 10% extra for overlaps and offcuts.
- Angular crushed stone, typically 0 to 32 mm or ¾ inch minus.
- Nonwoven separator geotextile if the subgrade is clay, silt, or wet.
- Pins or U-staples, plus timber, kerb, or steel edge restraint.
A Two-Day Schedule for 50 m²
| When | What happens |
|---|---|
| Day 0 | Call for utility locates. Order stone and grid. Confirm where water will drain. |
| Day 1, morning | Strip topsoil and soft spots. Shape the crown. Proof-roll the subgrade. |
| Day 1, afternoon | Place separator if needed. Build and compact the bed. Roll out, tension, overlap, and pin the grid. |
| Day 2 | Place cover from the far end. Compact in lifts. Shape the crown. Install edge restraint. Inspect. |
Two people are enough for 50 m²; use three for a long lane or anything over 100 m². Call the utility locate service before you dig. Do not open the subgrade if heavy rain is forecast within 24 to 48 hours.
A Worked Material Estimate
For a 5 m by 10 m driveway with 150 mm of compacted cover:
- Compacted stone: 50 × 0.15 = 7.5 m³. Loose at 1.3×: 9.75 m³.
- Tonnage at about 1.6 t/m³: 12 tonnes. Order about 13 tonnes with waste.
- Geogrid: 50 m² plus 10%, so about 55 m². Two 2 m by 15 m rolls give 60 m².
A 200 m² driveway needs about 30 m³ of compacted stone, roughly 48 tonnes, and three to four days with a roller.
How to Install Geogrid for a Gravel Driveway: The 7 Steps
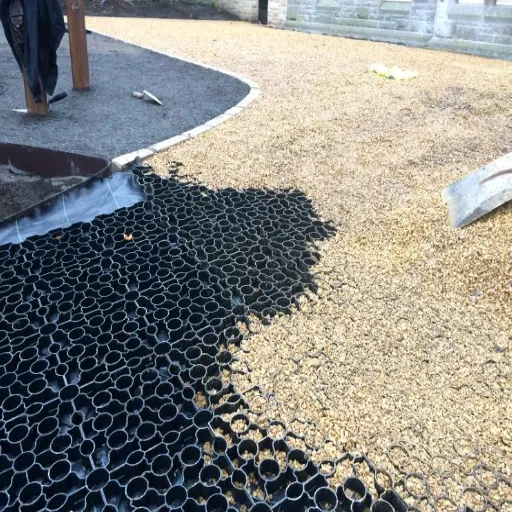
The steps below are the driveway version of the general process. For the engineering protocol across road base, walls, and slopes, read the general geogrid installation protocol.
Aisha learned the value of sequence on a 60 m² job in a wet spring. A proof roll found a soft patch near the gate that she had planned to cover. She dug it out and added 200 mm of compacted crushed rock. The delay cost half a day; covering it would have cost the whole job.
Step 1: Strip, Shape, and Proof-Roll the Subgrade
Remove topsoil, roots, and any soft spots. Shape the lane to a 2 to 3% crown or crossfall so water runs off. Compact the exposed subgrade.
Then proof-roll it. Drive a loaded vehicle or roller slowly over the whole area and watch for deflection. Mark any soft patch, dig it out, and replace it with compacted angular stone. For subgrade acceptance criteria, see FHWA geotechnical guidance.
Pass or fail: no visible deflection under a loaded wheel, and water drains off the lane.
Step 2: Decide Whether You Need a Separation Geotextile
On clay, silt, or wet fine-grained subgrade, place a nonwoven separator before the grid. It stops fine particles from pumping into the stone and keeps the base draining. On clean, firm, granular soil, it is optional.
The order is subgrade, geotextile, geogrid, then stone. Fabric separates; grid reinforces. For the full clay case, see geogrid for a driveway on clay soil.
Pass or fail: fabric lies flat, overlaps 300 mm, and stays covered at the edges.
Step 3: Build a Flat, Compacted Bed for the Grid
Place 100 to 150 mm of angular crushed stone over the subgrade or separator. Rake to a consistent depth and compact. The grid needs a flat, supported bed; it cannot develop tension over hollows or soft mud.
Check with a 3 m straightedge. Any gap deeper than about 25 mm needs more stone.
Use angular, well-graded stone around 0 to 32 mm. The D50 should be roughly half the grid aperture. For the full specification, see aggregate for geogrid base course. For depth by soil and traffic, see how much gravel over geogrid.
Pass or fail: no deep footprints on the bed, and the straightedge does not rock.
Step 4: Roll Out, Orient, and Tension the Geogrid
Unroll the grid across the lane. For a biaxial grid, the ribs run across and along the driveway. For a uniaxial grid, follow the manufacturer’s marking and place the strong direction in line with the main load.
Pull it taut by hand or with a bar. Work from one end and walk out the wrinkles. The grid should contact the bed across its whole area.
Pass or fail: no wave taller than about 25 mm, and the grid does not slide underfoot.
Step 5: Overlap, Pin, and Anchor the Edges
Overlap seams by ground condition:
| Ground condition | Minimum overlap |
|---|---|
| Firm, well-drained soil | 300 mm |
| Medium or seasonally soft soil | 500 mm |
| Soft clay, silt, or organic soil | 750 to 900 mm |
Stagger the ends of adjacent rolls so seams do not line up across the lane. Pin at 1 to 2 m intervals along edges and overlaps. On soft ground, place a stone pile at the start of each roll. For the research behind these widths, see NAUE’s geosynthetic guidance.
Pass or fail: no seam pulls apart by hand, and the pins hold the grid flat in wind.
Step 6: Place Cover Without Driving on the Grid
Back-dump from the far end and push stone forward with the bucket. Keep at least 150 mm of cover ahead of any machine. Never drive a wheel or track on exposed grid.
The first lift should be 150 to 200 mm loose. Do not dump from height; drop stone onto the placed material, then spread forward.
Pass or fail: no grid visible, no track marks showing through, and cover depth is consistent.
Step 7: Compact, Shape, and Restrain the Edges
Compact in 150 to 200 mm lifts to about 95% Standard Proctor. Adjust moisture as you go. Use a plate compactor along edges and a roller in open areas.
Shape the crown to 2 to 3% and tie the surface into a side ditch. Install edge restraint before the final pass. Without it, stone spreads into the lawn and the edge unravels.
Pass or fail: no rut under a loaded wheel, edges held, and water runs to the ditch.
Driveway Details That Decide Whether It Works
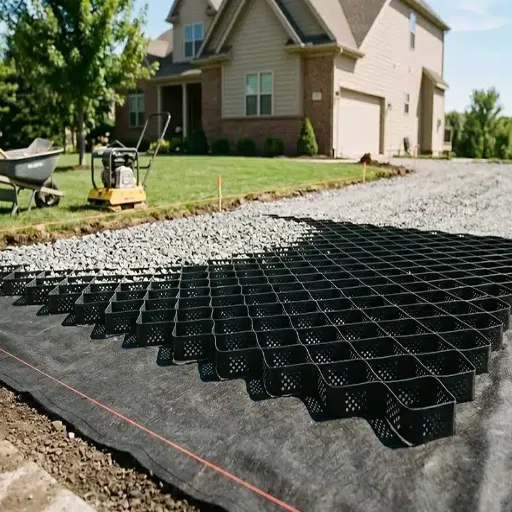
Slopes. On grades above about 8 to 10%, bench or terrace the lane. Geogrid helps the base, but drainage and erosion control decide the outcome. Steep slopes and retaining walls need an engineer.
Turns and gates. Shear forces peak where vehicles turn and where the driveway meets the road. Increase overlap and anchorage there. Consider a triaxial grid for a turning circle.
Existing gravel. Install over existing gravel only if it is firm and free of excess fines and organics. Scarify, regrade, proof-roll, then place the grid and top up. Grid over loose, contaminated gravel never develops tension.
Long or shared driveways. Work in sections and keep one lane usable. Plan deliveries so trucks avoid fresh cover.
Cold climates. Frost heave and spring thaw weaken the subgrade. Add 50 to 100 mm of cover in frost-prone areas and make sure water can leave the base. For the full cold-climate picture, see geogrid frost heave.
The Pass/Fail Inspection Checklist
Most questions about how to install geogrid for a gravel driveway come down to these three gates. Print this and check each one. Once the grid is buried, you cannot inspect it without undoing the work.
Gate 1: Before the grid
- Proof roll shows no deflection under a loaded wheel.
- Soft spots are dug out and replaced, not covered.
- Crown or crossfall is 2 to 3% with a clear water exit.
- Separator, if used, overlaps 300 mm and lies flat.
Gate 2: Before cover
- Bed is flat within about 25 mm under a 3 m straightedge.
- Grid is taut, with no wave taller than 25 mm.
- Overlap matches the ground: 300, 500, or 750 to 900 mm.
- Seams are staggered, and pins hold the grid flat.
Gate 3: After compaction
- Cover is at least 100 to 150 mm compacted; first lift 150 to 200 mm loose.
- A loaded wheel leaves no rut.
- Edge restraint is installed and holding.
- Surface drains to the ditch, not toward a building.
Want the checklist as a printable one-page PDF? Request the driveway installation checklist and we will send it with your quote.
Geogrid Driveway Installation Mistakes That Waste the Grid
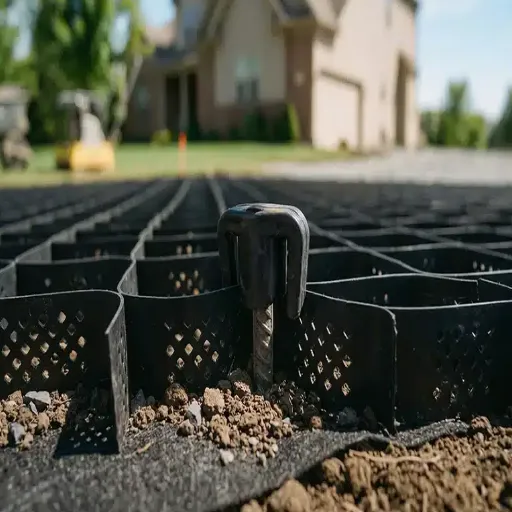
- Laying grid on raw mud or topsoil. The grid has nothing to grip, so it cannot carry tension. Strip, shape, and compact first.
- Using rounded gravel or pea gravel. Rounded stone rolls instead of interlocking. Use angular, well-graded crushed stone.
- Leaving the grid slack or wrinkled. A loose grid moves with the stone instead of restraining it. Pull it taut and pin it.
- Driving on exposed grid. Wheels and tracks stretch, tear, and displace the mesh. Cover it before any machine crosses.
- Covering too thin. Less than 100 mm of compacted cover lets the grid be damaged during placing. Keep 150 mm ahead of equipment.
- Skipping edge restraint. Without an edge, stone spreads into the lawn and the driveway loses its shape. Install timber, kerb, or steel edging.
- Ignoring drainage. A grid cannot fix standing water, a blocked culvert, or a spring. Fix the water path before you bury the grid.
DIY or Contractor? How to Decide
DIY makes sense for a flat, well-drained driveway under about 100 m², with a helper, a rental compactor, and a dry weather window. The work is physical but not complicated. The checklist matters more than experience.
Call a contractor or engineer when the driveway is steep, retains soil, sits on soft or expansive clay, crosses a spring, serves commercial traffic, or needs a designed base thickness.
Greg planned to install 120 m² himself. Halfway through day one, he found a soft section that kept pumping water. He stopped, called a contractor, and had the subgrade repaired and a culvert cleared. His DIY labour still saved money, but only because he stopped when the ground told him to.
The grid is usually a small share of the project cost. Stone, haulage, and excavation dominate. Get the base right before you spend on reinforcement.
Frequently Asked Questions
Can I put geogrid over existing gravel?
Only if the existing gravel is firm, clean, and free of excess fines. Scarify, regrade, and proof-roll it first. Loose or contaminated gravel will not grip the grid.
Do I need pins to hold geogrid down?
Yes on most driveway jobs. Pin edges and overlaps at 1 to 2 m intervals. Pins keep the grid flat while you place cover and stop it lifting in wind.
Can I drive on geogrid before covering it?
No. Wheels and tracks stretch and tear exposed grid. Cover it with at least 150 mm of stone before any machine crosses.
Does geogrid go under or over the geotextile?
Geotextile goes directly on the subgrade. Geogrid goes on top of the geotextile, then the stone. The fabric separates; the grid reinforces.
How deep should the gravel be over geogrid?
At least 100 to 150 mm of compacted angular stone for car traffic. Use 200 to 250 mm on soft clay, and 300 to 450 mm on very soft ground.
Is geogrid the same as a gravel grid or geocell?
No. A gravel grid or geocell is a cellular paver that confines stone near the surface. Geogrid is a reinforcement mesh placed at the base interface. They solve different problems.
Conclusion
How to install geogrid for a gravel driveway comes down to seven steps and three checks. Prepare and proof-roll the subgrade. Separate clay and silt. Build a flat, compacted bed. Roll the grid taut. Overlap and pin it. Cover it without driving on it. Compact, shape, and restrain the edges.
The three checks are simple: no deflection before the grid, no wave before cover, no rut after compaction. If a check fails, fix it before you move on. The grid is cheap compared with the cost of doing the job twice.
If you are unsure about your soil, your depth, or your drainage, request a technical quote with your driveway dimensions and a few photos. Our engineering team will confirm the layer order and the grid grade before you order.