The right geogrid is the one matched to your job’s engineering function, soil, and load direction: uniaxial for retaining walls and slopes, biaxial for roads and driveways, and triaxial (multiaxial) for heavy, multi-directional traffic on soft bases. To choose it, work through six decisions in order: define the function, match the type to the load, read the soil, specify strength the right way, match the aperture to the aggregate, and weigh durability, installation, and total cost.
Consider what happened to a contractor who skipped that sequence. He ordered the strongest grid he could find for a small retaining wall, a 200 kN/m uniaxial geogrid, and paid a premium for it. The wall was fine because the grid happened to be right for a wall. Six months later he used the same roll under a gravel driveway. A uniaxial geogrid carries load in one direction only, so under a driveway with turning trucks and parking loads it added almost no confinement, the stone rutted, and he re-did the base. The “strongest” grid was the wrong tool, and strength on paper meant nothing without the right geometry.
By the end of this guide you will know exactly how to choose a geogrid for your project: which type suits which application, what soil and CBR data you need to gather, which specification numbers matter and which are marketing, how to match the aperture to your aggregate, and how to compare quotes from suppliers without getting burned. This article is the decision hub of our wider complete geogrid guide to types, applications, and how to choose, so we keep each step practical here and link out where a topic deserves its own deep dive.
Key Takeaways
- Choose geogrid type by load direction: uniaxial for walls and slopes, biaxial for roads and driveways, triaxial for heavy multi-directional traffic on soft ground.
- Never select on ultimate tensile strength (UTS) alone; for stabilization, junction efficiency, aperture geometry, and radial stiffness matter more.
- Match the aperture to your aggregate (roughly 1.5-3x the D50 particle size) or interlock fails and the grid does little.
- Read the soil first: a bare geogrid suits granular subgrades above roughly CBR 3; below that you need a separator or geogrid-geotextile composite.
- Compare total installed cost and verified test reports, not unit price, and ask suppliers for LTDS data on long-term structures.
How to Choose a Geogrid: A 7-Step Decision Framework
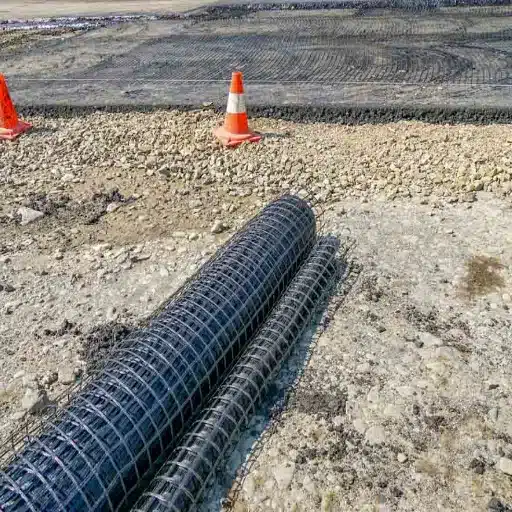
Choosing a geogrid is a process, not a datasheet comparison. If you follow the same sequence an experienced geotechnical engineer uses, you will rarely go wrong. Work through these seven steps and each later step gets easier because the earlier ones narrow your options.
- Define the engineering function. Is the grid carrying long-term tensile load in a structure (reinforcement), or confining aggregate under traffic (stabilization)?
- Match the type to the application and load direction. Uniaxial, biaxial, or triaxial, based on where the loads pull.
- Read the soil and site. Subgrade type and California Bearing Ratio (CBR), plus drainage.
- Specify by performance, not just tensile strength. Consider strength at low strain, junction efficiency, aperture, and long-term design strength.
- Match the aperture to the aggregate. Interlock is the whole point of a geogrid.
- Weigh durability, installation, and total cost. A cheap roll that is hard to install or wrong for the environment is expensive.
- Qualify the supplier and request an apples-to-apples quote. Compare certified test reports, not just price per square meter.
Each step below is one short decision. If you are choosing a grid for a specific site, this whole article takes about the time it takes to pour a coffee, and the printable checklist in Section 8 is the part you take to the supplier meeting.
Step 1: Reinforcement or Stabilization? Define the Job First
The first question is not “which geogrid” but “what is the grid actually doing.” This single distinction drives every other choice, and it is the one most buyers get wrong.
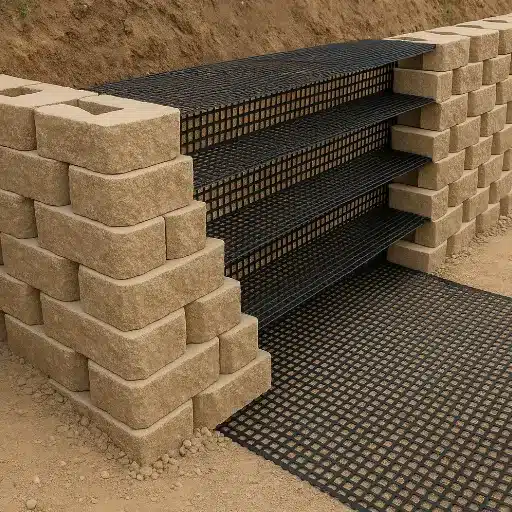
Reinforcement means the geogrid carries long-term tensile load as part of a structure. That is what happens in a mechanically stabilized earth (MSE) retaining wall, a steep slope, or an embankment, where the soil wants to slide and the grid holds it together. Reinforcement grids need high tensile strength in one dominant direction and strong creep resistance, because the load stays on them for decades.
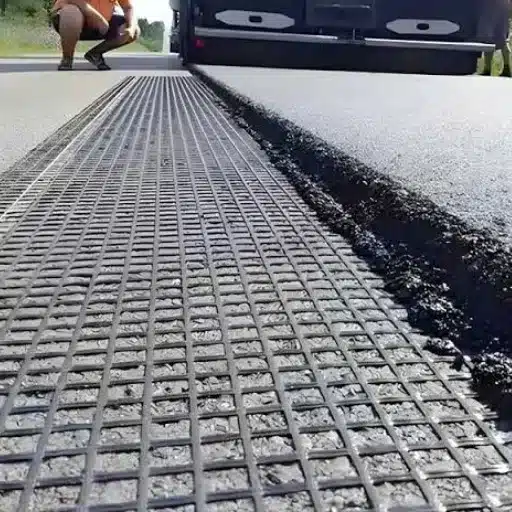
Stabilization means the geogrid confines and interlocks the aggregate above it to stiffen a pavement or base layer under traffic. That is what happens under a road, driveway, or working platform. Stabilization grids rarely need a single huge tensile number; they need good junction efficiency, the right aperture, and stiffness that works in all the directions traffic pulls.
A quick test: is this a load-bearing structure or a pavement layer? Structure points to reinforcement; a surface that carries traffic points to stabilization. If you want the mechanism explained in depth, our guide to how geogrid soil reinforcement works walks through interlock, lateral restraint, and the tensioned membrane effect.
Step 2: Choose the Geogrid Type by Application and Load
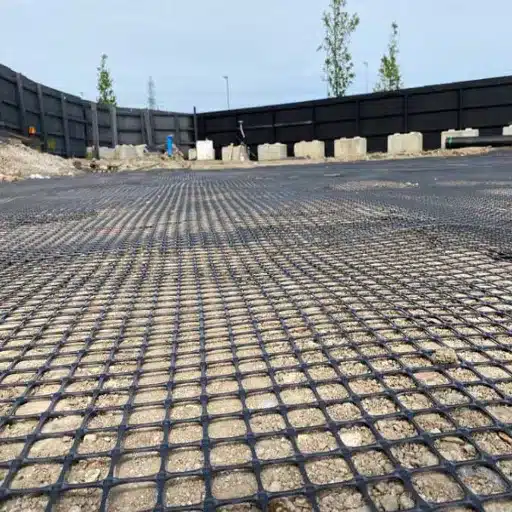
Geogrids are classified by the direction in which they carry load, so the type follows the load. Picking the wrong family is the most common selection error and a frequent cause of premature failure.
Uniaxial Geogrid: One Strong Direction
A uniaxial geogrid has high tensile strength in a single direction, along the roll. It is built for retaining walls, MSE walls, bridge abutments, and steep slopes where there is one dominant pull. It must be installed with the strong axis perpendicular to the wall or slope face; misorientation can cut effective strength by up to 70%.
Biaxial Geogrid: Equal Strength in Two Directions
A biaxial geogrid has balanced strength in the machine and transverse directions and a rectangular or square aperture. It is the standard choice for gravel driveways, road bases, parking areas, and working platforms, where traffic comes from many angles and the grid works by confining the aggregate. It is not a substitute for a uniaxial grid in a wall.
Triaxial (Multiaxial) Geogrid: Stiffness in Every Direction
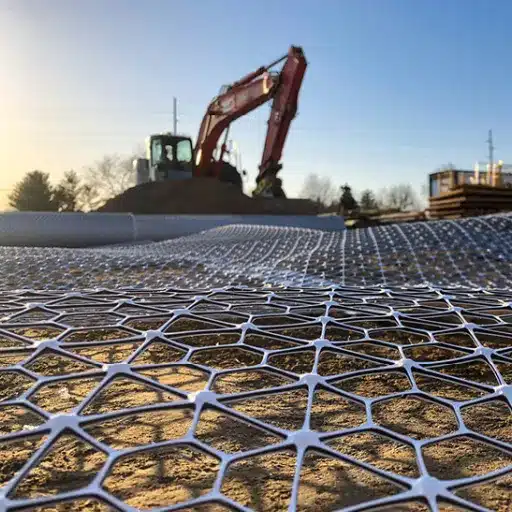
A triaxial or multiaxial geogrid uses a triangular or hexagonal aperture pattern to give radial stiffness in 360 degrees. It suits heavy, high-traffic, or soft-subgrade pavements where aggregate confinement in all directions controls rutting. When the choice sits between biaxial and triaxial, our biaxial vs triaxial geogrid comparison lays out the load and cost trade-offs.
Quick Type-Selection Table
| Application | Dominant load | Start with | Properties to prioritize |
|---|---|---|---|
| Gravel driveway / private road | Cyclic, multi-directional | Biaxial | Aperture interlock, junction strength |
| Road base / parking / working platform | Cyclic, heavy | Biaxial or triaxial | Radial stiffness, junction efficiency |
| Retaining / MSE wall | One-directional tension | Uniaxial | Long-term strength (LTDS), creep resistance |
| Steep slope / embankment | One-directional tension | Uniaxial | Tensile strength, creep, soil friction |
| Soft clay / low-CBR site | Multi-directional + separation | Biaxial/triaxial + separator or composite | Separation plus interlock |
| Railway ballast / mine haul road | Heavy, multi-directional | High-strength biaxial/triaxial or composite | Working-platform function |
Step 3: Read the Soil and Site: CBR, Drainage, and Ground Type
The grid does not work alone; it works with the ground and the stone above it. Two site facts change your decision more than any datasheet: the subgrade soil type and its strength, expressed as CBR.
A granular, free-draining subgrade above roughly CBR 3 to 5 accepts a standard biaxial stabilization grid laid directly on the prepared surface. A cohesive, silty, or saturated subgrade below about CBR 3 behaves differently. Soft fines pump up through the apertures under traffic and contaminate the stone, so a bare grid is not enough. You need separation and filtration too, which means a geotextile separator under the grid or a factory-bonded geogrid-geotextile composite.
At a CBR below about 1, on very soft clay or peat, a single grid usually cannot carry the load on its own. You are into composite systems, double-layer “floating” construction, or cellular confinement, which we explain in geogrid for soft ground and subgrade stabilization.
One honest warning before you go further. A geogrid reinforces and confines what is already there. It does not fix standing water, high groundwater, or organic soil. If the site is wet or the problem is drainage, fix that first, then let the geogrid do its job. Ignoring this is how grids end up blamed for failures they never caused.
Step 4: Specify by Performance, Not Just Tensile Strength
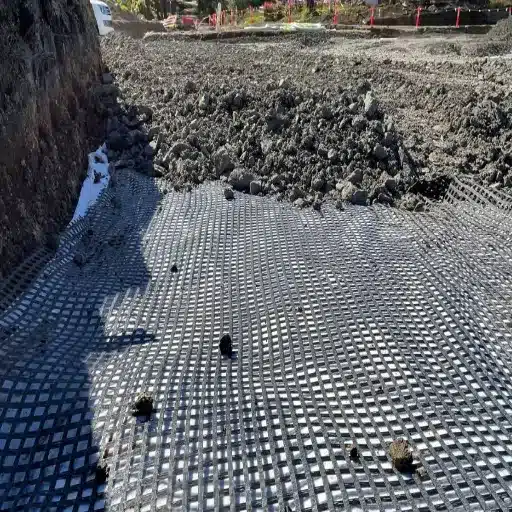
Every spec sheet leads with ultimate tensile strength (UTS), and every engineer will tell you the same thing: that number is a screening tool, not a design answer. Two grids with identical UTS can perform completely differently because of the properties below.
- Tensile strength at 2% and 5% strain. A road base only deforms a little before failure, so what matters is how much force the grid holds at low strain, not at break.
- Junction efficiency. The strength of the node where ribs cross, expressed as a percentage of rib strength. If the junctions are weak, the grid tears under repeated loads. A common benchmark is about 90% or higher.
- Aperture size and shape. Covered in Step 5, this decides whether the aggregate actually interlocks.
- Radial or secant stiffness. For stabilization, the grid’s in-plane stiffness in all directions is what spreads load and stops rutting.
- Creep resistance and LTDS. For walls and slopes that carry load for decades, design uses long-term design strength (LTDS), which is UTS reduced for creep, installation damage, and aging. This is why a wall grid specified to the wrong number fails years later.
The physical-properties guide from Tensar International, a widely read industry reference, explains these stabilization properties in useful detail. For the full standards picture, including the test methods behind each number, our geogrid specifications and tensile strength reference is the page to bookmark.
Indicative Strength Classes by Application
| Application | Typical type | Indicative strength class |
|---|---|---|
| Gravel driveway / light access | Biaxial PP | About 20-30 kN/m in each direction |
| Road base / working platform | Biaxial or triaxial | About 30-40 kN/m (biaxial); radial-stiffness spec (triaxial) |
| Soft-ground platform / haul road | High-strength biaxial or composite | 40-80+ kN/m, or geogrid plus separator |
| MSE wall / abutment | Uniaxial HDPE or PET | 50-200 kN/m, designed to LTDS not UTS |
| High wall / extreme slope | Uniaxial high-strength | 200+ kN/m, specialist design |
These are starting ranges for a specification discussion, not a substitute for design. Always confirm strength class against the project design and certified test reports from the supplier.
Match the Polymer to the Environment
The polymer also belongs in this step. Polypropylene (PP) is the standard for extruded biaxial road grids. Polyester (PET) offers excellent creep resistance but should be avoided in highly alkaline environments or in hot asphalt. HDPE combines flexibility and chemical resistance and is a common choice for creep-resistant wall grids. Fiberglass grids are stiff and used mainly for asphalt crack control, not for ground reinforcement. If a project stays exposed before cover, confirm the grid’s UV resistance or plan to cover it quickly.
Step 5: Match the Aperture to the Aggregate
A geogrid only works when the aggregate interlocks through its apertures and bears against the ribs. If the stone is too small for the apertures, it falls through and never locks. If it is too large, it cannot seat into the openings and the grid behaves like a smooth sheet.
The working rule used across the industry is to match the aperture to your aggregate’s mean particle size, D50, at a ratio of roughly 1.5 to 3 times the D50 (equivalently, the D50 should be about 0.5 times the aperture). Coarse, angular stone interlocks reliably; rounded river gravel does not, which is why you will see specifications call for crushed, angular aggregate over geogrids. The geotechnical education library from Geoengineer.org has a clear introduction to how this interlock mechanism works.
When you are not sure, tell the supplier your aggregate gradation and ask which aperture they recommend. A reputable supplier will ask for that number before quoting, and that question alone filters out most of the noise.
Step 6: Weigh Durability, Installation, and Total Cost
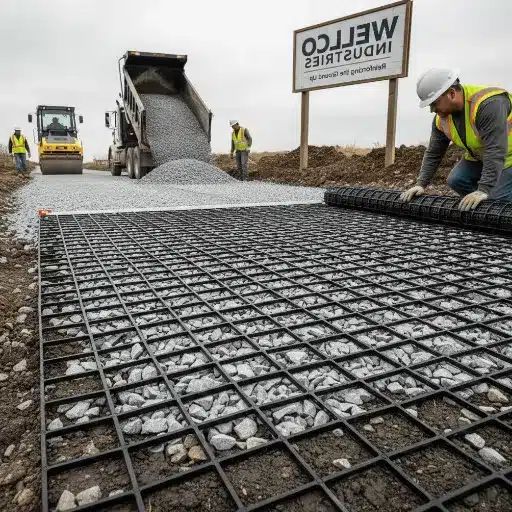
A technically perfect grid that is hard to install or wrong for the budget usually gets substituted on site, so design for the real world.
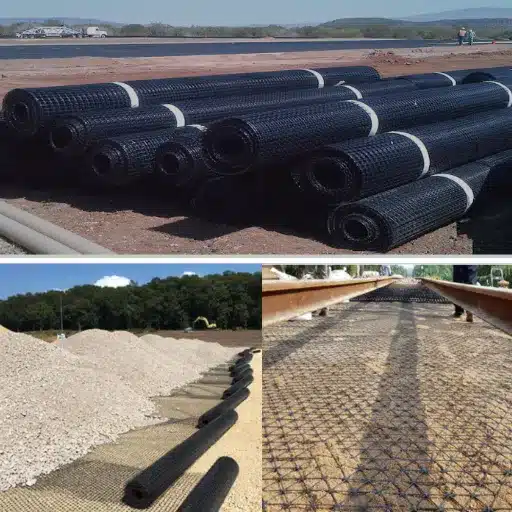
Installation that survives. Lay the grid flat and taut, never with waves or wrinkles. For uniaxial grids, confirm the strong direction is perpendicular to the wall or slope face. Overlap adjacent rolls by roughly 30 to 45 cm, more like 60 cm on soft ground, and stagger the joints. Never run equipment directly on exposed geogrid; place at least 150 mm of cover in the first lift before trafficking.
Durability over the design life. For a road base that fails in the first few years, the failure is almost always installation or aggregate, not the polymer. For a wall that must last 100 years or more, creep resistance and LTDS govern, and the polymer choice matters.
Total cost, not unit price. A grid that costs more per square meter often ends up cheaper because it lets you cut aggregate. Well-designed stabilization routinely reduces base-course thickness by 20 to 50%, and that stone is usually the most expensive part of the pavement. When you model fill volume, freight, labour, and rework against the unit price, the “cheap” grid is frequently the expensive one. Our geogrid cost per square meter guide walks through the full 2026 pricing picture and the installed-cost math.
Geogrid Selection Matrix and Checklist
Here is the whole decision process on one page. Read your application down the table, then take the checklist to your spec meeting.
| Application | Recommended type | Polymer | Prioritize | Typical role |
|---|---|---|---|---|
| Gravel driveway | Biaxial | PP | Aperture, junction strength | Stabilization |
| Road base / parking | Biaxial or triaxial | PP | Radial stiffness, aperture | Stabilization |
| Working platform | Biaxial or composite | PP / PET | Junction efficiency, separation | Stabilization |
| MSE wall / abutment | Uniaxial | HDPE / PET | LTDS, creep resistance | Reinforcement |
| Steep slope | Uniaxial | PET / HDPE | Tensile strength, creep | Reinforcement |
| Soft clay / low CBR | Biaxial/triaxial + separator or composite | PP / PET | Separation plus interlock | Stabilization |
| Railway / mine haul | High-strength biaxial/triaxial | PET / PP | Working-platform function | Stabilization |
Geogrid selection checklist. Run through these ten points and you will not miss the critical one.
- Is the job reinforcement or stabilization?
- What is the dominant load direction and traffic level?
- What is the subgrade CBR and soil type?
- Do I also need separation or filtration (geotextile or composite)?
- Which grid family matches: uniaxial, biaxial, or triaxial?
- What strength class do I need, and is it quoted as UTS or LTDS?
- Is the aperture matched to my aggregate D50?
- Is the polymer right for the environment and design life?
- Can it be installed correctly, with the right orientation, overlap, and cover?
- Am I comparing total installed cost and verified test reports, not just unit price?
Common Geogrid Selection Mistakes (and When a Geogrid Is the Wrong Answer)
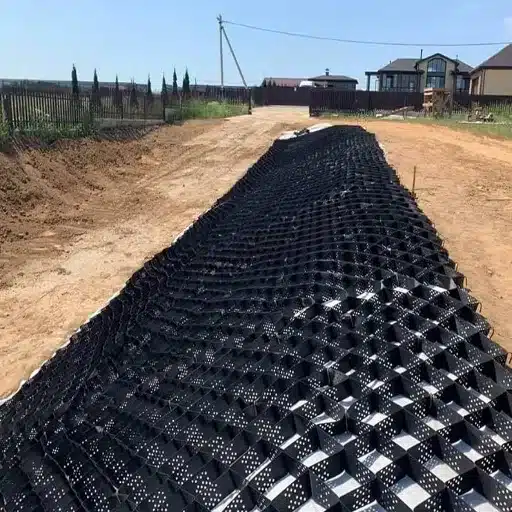
Some mistakes are so common they deserve their own list, because each one is a project that failed for a preventable reason.
- Choosing on UTS alone. The strongest grid on paper is often the wrong geometry for the job.
- Wrong type for the application. A biaxial grid under a wall, or a uniaxial grid under a driveway, both fail for the same reason: the load direction does not match the grid.
- Ignoring the soil. No separation on soft, cohesive ground means fines pump through the apertures and ruin the base.
- Ignoring the aggregate. Round or oversized stone never interlocks, so the grid does almost nothing.
- No low-strain or LTDS thinking. Road bases strain a little; walls load for decades. Quote the right strength basis for each.
- Buying on unit price. The cheapest square meter usually costs the most per square meter of working pavement.
- Ignoring orientation. Rotating a uniaxial grid in a wall can cut effective strength by up to 70%.
There is also a category of site where a geogrid is simply the wrong answer, and an honest supplier will say so. If the problem is drainage, moisture, or organic soil, fix those first. If the ground is so soft that the issue is subgrade shear rather than aggregate confinement, you may need a geogrid-geotextile composite, a geocell, or chemical stabilization instead. A geogrid reinforces the layer above it; it does not cure the soil below it.
How to Buy a Geogrid: Qualify the Supplier and Get an Apples-to-Apples Quote
When you are ready to buy, specify a system, not a product name. One paragraph is enough to get useful quotes: state the function, soil type and CBR, traffic loading, geogrid family, strength class with the LTDS basis, aperture and aggregate size, polymer, roll width, and delivery location.
Then qualify the supplier against a short checklist. Ask for wide-width tensile test reports, strength at 2% and 5% strain, junction efficiency data, creep and LTDS information for long-term structures, aperture and roll dimensions, polymer and UV data, and evidence of quality control such as ISO 9001. If a supplier cannot or will not produce test documentation, move on.
At Shanxi Shengxing we supply export-ready PP, PET, and HDPE geogrids across these families, and we treat the spec conversation as part of the sale. Send us your aggregate gradation and subgrade CBR and we will recommend a grid rather than a price list. Our engineering team supports international buyers with technical consultation, certified test reports, and flexible order quantities, so you can explore our geogrid products or request a technical quote with the spec paragraph above.
Frequently Asked Questions
What type of geogrid do I need for a driveway?
For a gravel driveway, use a biaxial geogrid. Driveway traffic is cyclic and multi-directional, and a biaxial grid confines the aggregate so it does not rut or shove. Choose a PP biaxial grid around 20 to 30 kN/m and match the aperture to your stone.
Is biaxial or uniaxial geogrid better for a retaining wall?
Uniaxial. A retaining wall pulls in one dominant direction, and a uniaxial grid carries that tension along its strong axis. It must be installed with the strong direction perpendicular to the wall face, and it should be specified to long-term design strength (LTDS), not ultimate tensile strength.
How strong does a geogrid need to be?
Strong enough for the load and function, which is why strength class follows application. A driveway may need only 20 to 30 kN/m of biaxial strength, while an MSE wall can need 50 to 200 kN/m of uniaxial strength designed on LTDS. Ask what strength basis the supplier is quoting.
What is the difference between UTS and LTDS?
Ultimate tensile strength (UTS) is the peak force the grid reaches in a lab test. Long-term design strength (LTDS) is UTS reduced for creep, installation damage, and aging, and it is the number used for structures that carry load for decades. Comparing quotes on UTS alone can mislead you for walls and slopes.
How do I match geogrid aperture to aggregate?
Match the aperture to your aggregate’s mean size, D50, at a ratio of roughly 1.5 to 3 times the D50. If the stone passes through the apertures without locking, or is too large to seat, the grid cannot interlock and adds little strength.
Do I need a geotextile under a geogrid?
Only when you need separation or filtration, which is usually the case on cohesive, silty, or saturated subgrades below about CBR 3. On clean granular ground, a geogrid alone is typically enough; on soft ground, add a separator or use a bonded geogrid-geotextile composite.
Conclusion
Choosing a geogrid is a sequence of six decisions, not a search for the strongest datasheet. Define the function first, reinforcement or stabilization. Match the type to the load direction: uniaxial for walls and slopes, biaxial for roads and driveways, triaxial for heavy multi-directional traffic. Read the soil and its CBR, and add separation when the ground is soft. Specify strength the right way, on low-strain performance and LTDS rather than UTS alone. Match the aperture to your aggregate so interlock actually happens. Then weigh durability, installation, and total installed cost, and buy from a supplier who will produce certified test reports.
The cheapest square meter is rarely the cheapest pavement, and the strongest grid is rarely the right one. Start from your site and your load, and the correct geogrid becomes obvious. If you want the full engineering background behind these rules, return to our complete geogrid guide to types, applications, and how to choose.
When you are ready to specify, our team can help you close the gap between a good decision and the right product. Send us your soil data and aggregate gradation, and we will recommend a geogrid with the test documentation to back it. Request a technical quote or browse our geogrid products to get started.