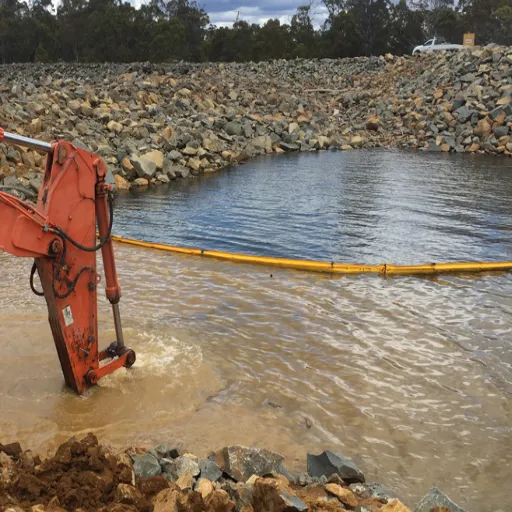
Silt curtain inspection and repair starts with a located defect and ends with a documented recheck and the required acceptance decision. Compare the curtain with the accepted site layout. Record what you cannot see, follow the approved repair method, and obtain the required clearance before affected work resumes.
A straight float line can conceal a damaged joint below the surface. A completed patch can leave a displaced mooring unresolved. For a supervisor taking over the next shift, the useful question is: what was checked, what changed, and who accepted the result?
This guide gives inspectors and construction teams a component checklist, a response matrix and a defect-register template. It focuses on ongoing condition and corrective action. Use the separate installation readiness checks to establish the installed-state baseline; keep sampling procedures and removal methods in their own plans.
Key Takeaways
- Set the inspection schedule from the controlling project requirements and delivered-system instructions.
- Distinguish visible damage, suspected sediment release and a monitoring trigger; each needs its own evidence.
- Match repair materials and methods to the actual curtain and its connections.
- Close a finding only when the required recheck, records and acceptance decision exist.
Before the next inspection, assemble the accepted layout, component instructions and current inspection sheet. These documents make the checklist below specific to your site.
Set the Inspection Basis Before the Next Shift
Identify the controlling documents and people
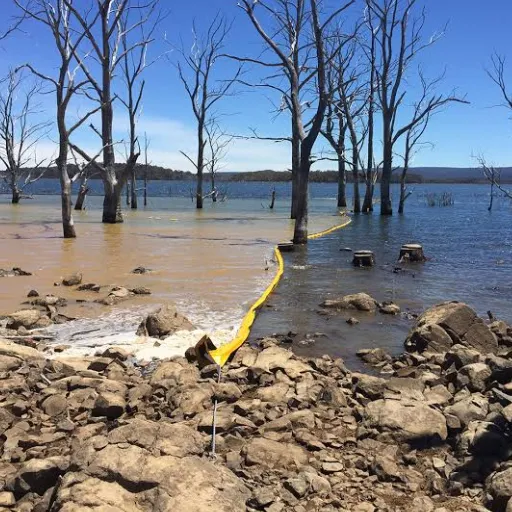
Start with the current approved layout, environmental requirements, installation acceptance record and manufacturer’s instructions. Record their revisions. Identify the curtain sections, shore connections and mooring locations so another inspector can find the same point without guessing from a photograph.
The site plan should identify who inspects, who arranges corrective work, who reviews environmental results and who authorizes affected operations. These may be different people. Write their actual roles and contact route on the inspection record, including the arrangement outside normal working hours.
Agree how inaccessible sections will be handled. A shore walk, boat inspection and underwater inspection provide different coverage. The inspection sheet should let the observer mark an item as unobserved and assign follow-up, rather than force every row into pass or fail.
Use routine and event-triggered checks
An inspection interval needs a source and an owner. The Illinois Urban Manual’s floating silt curtain standard, Code 917, calls for at least daily inspection and additional checks after runoff events and heavy winds. That is a named regional practice, not a universal legal interval for every project.
Other manufacturer guidance varies with exposure and use. Resolve differences through the project’s responsible reviewer before adopting a schedule. A general maintenance interval does not cancel a more frequent permit or project requirement. State which events require a new check, what observations are required, and the access arrangements.
Illustrative scenario: A shift inherits an undated inspection sheet after a windy night. One float now sits lower than its neighbors. The inspector records the change and checks whether a fresh event inspection is due.
Debris, a trapped skirt and damaged flotation remain possible causes until the approved inspection can establish what happened. The low float alone does not tell the repair owner which part to replace.
Inspect the Float Line, Joints, Skirt and Moorings
Record observations by component
Compare visible alignment and condition with the accepted baseline. Follow panel IDs along the curtain and note the observation position, weather and water conditions. Take an overview that locates each finding, then a detail view that shows the damage. Use a consistent reference so later photographs can be compared.
The following checklist suggests observations and follow-up questions. It does not assign a severity grade or approve a repair. The Chatoyer Silt Curtain Design Guide, printed page 17, discusses position, entanglement, skirt loading, connection integrity, anchor-line wear and inspection records.
| Component | Observation to record | Question before deciding the response |
|---|---|---|
| Float chambers | Low section, visible damage, changed freeboard | Is flotation damaged, or is another load pulling the section down? |
| Fabric and seams | Tear, abrasion, open seam, loose material | How far does damage extend, including below the visible area? |
| Panel connections | Open joint, missing fitting, distorted connector | Is the joint complete, and is the connection carrying load as intended? |
| Load lines and hardware | Wear, broken parts, displaced attachments | Which load-carrying components need the manufacturer’s or designer’s review? |
| Moorings and shore ends | Changed alignment, worn line, open end gap | Does the arrangement still match the accepted drawing? |
| Skirt and ballast | Folding, entanglement, suspected bottom pinning | Is the skirt free to hang as intended, and what remains unseen? |
| Debris and growth | Trapped refuse, visible accumulation | What approved maintenance can remove the load without disturbing controls? |
Low freeboard means less of the float is visible above water. Record the observed change without automatically naming a failed component. Similarly, an apparently shifted curtain does not establish that an anchor dragged; the mooring and its connections need checking.
If alignment has changed, compare the anchoring layout and site inputs with the accepted arrangement. Record shore-end gaps as well as offshore defects. A connection problem at an end should not disappear from the report because most panels look orderly.
Where visible, check that ballast and its attachments remain in place; record any section that cannot be seen. Compare the affected joint with adjacent panels. Include marker buoys and lights where the site requires them, noting missing or damaged parts without treating those observations as proof of underwater condition.
State the limits of the view
A surface photograph cannot confirm the full submerged skirt or every joint. Chatoyer explicitly notes the limits of visual inspections near the waterline and the possible need for more thorough underwater inspection. Choose the inspection method through the approved access and safety arrangements; this is not an instruction to enter the water.
For remote images or underwater footage, identify the panel, depth range and area actually covered. Poor visibility or an obstructed view remains a limitation. Compare suspected folds or bottom contact with the specified skirt depth and clearance. Nominal skirt length alone cannot establish its deployed shape.
Escalate Defects and Sediment Releases Through the Site Plan

Separate the observation from the explanation
A physical defect, a visible plume and a monitoring exceedance describe different evidence. They may occur together, but one does not prove the cause of another. Record their locations and times separately, then cross-reference the records. Use the approved turbidity monitoring and response procedure for instrument checks, sampling and environmental interpretation.
Use the site’s work controls and notification route when an applicable trigger is met. Do not wait for a root-cause conclusion before making a required notification. This template deliberately leaves project-specific triggers and authority to be filled from the controlling plan.
| Observed event | Applicable trigger or requirement | Action and responsible role | Evidence needed for release |
|---|---|---|---|
| Located physical defect | Enter the relevant plan clause | Enter controls, repair owner and reviewer | Required physical recheck and acceptance |
| Suspected sediment release | Enter the observation-response rule | Enter notifications and investigation owner | Inspection and monitoring records required by the plan |
| Monitoring trigger reached | Enter the approved criterion | Enter the specified response and authority | Required recovery evidence and release decision |
| Condition cannot be verified | Enter the inspection-coverage requirement | Enter access review and follow-up owner | Completed coverage or an authorized alternative |
Keep repair, configuration change and release distinct
The Town of The Blue Mountains’ outfall project updates provide a useful real example. On July 10, 2026, the Town reported a turbidity alert, inspection and immediate securing of a minor curtain failure. Its July 30 update separately described approval of an amended construction plan and changed curtain configuration. On November 6, it reported another curtain adjustment following elevated turbidity.
These are distinct reported events. The updates do not establish a universal repair method or prove that one event caused a later change. Apply your own plan to the response matrix above. Name the person who must act and the evidence they need to review; a blank authority field leaves the decision unresolved.
For your site, record which decision is being requested: physical repair acceptance, approval of a changed arrangement, environmental recovery confirmation or permission to resume affected work. A repair photograph alone cannot answer all four. Avoid inventing a tear-size cutoff, water-quality threshold or notification deadline for the checklist.
Choose an Approved Repair or Panel Replacement and Reinspect
Match the method to the delivered system
Identify the panel, fabric, coating, connector and load-carrying parts before selecting a repair. Follow the applicable manufacturer’s instructions for preparation, compatible materials, joining method and handling restrictions. Illinois Code 917 directs users to manufacturer recommendations for fabric and material repair. That direction does not make a patch kit suitable for every curtain.
Manufacturer guides can be precise about their own repair processes. Treat their adhesive, heat settings, patch dimensions and drying instructions as product-specific. Do not transfer a convenient recipe to unidentified fabric. If the system cannot be identified, request the relevant documentation and keep the repair method unresolved.
Assess the whole damaged area. A repair proposal should address adjacent seams, connections and load lines where affected, rather than only the most visible hole. Compare repair access and required handling with the practical option of a compatible replacement panel. Chatoyer notes that spare sections can help when a panel is ripped or torn; spare availability does not establish compatibility or authorize installation.
Send the panel ID, overview and detail photographs, component identification and observed conditions to the delivered-system manufacturer when method confirmation is needed. Ask for the applicable instruction and acceptance checks. Keep that answer with the defect record.
Plan access and maintain the required controls
The responsible team should define safe access, handling and how containment will be managed during the intervention. Refer to the site’s approved method rather than improvising a gap in the curtain. Record temporary controls and who checks them. Persistent displacement or repeated connection damage needs design review, not an endless sequence of identical patches.
Illustrative scenario: An inspector finds torn fabric beside a split connector. A fabric patch would address only part of the observation. The repair owner asks for a compatible connection repair or replacement and a check of the affected load path. Until that decision and its recheck are recorded, the connector finding stays open even if the fabric looks closed.
Verify the repair and the remaining conditions
Check the repaired area again with a method that can show whether the defect has been corrected. Has the open joint closed, and can the full repaired area be seen? Check the connection, nearby fabric and layout against the accepted method. Record the conditions and any limits to the view.
Link this check to the original finding so the reviewer can compare the same location. Acceptance of the repair, evidence of water-quality recovery and permission to restart are separate decisions. If the plan requires monitoring results or another approval, attach those records before closing the action. State which work restrictions remain.
Keep a Defect Register That Shows How Each Finding Closed
Use a record that preserves the original observation
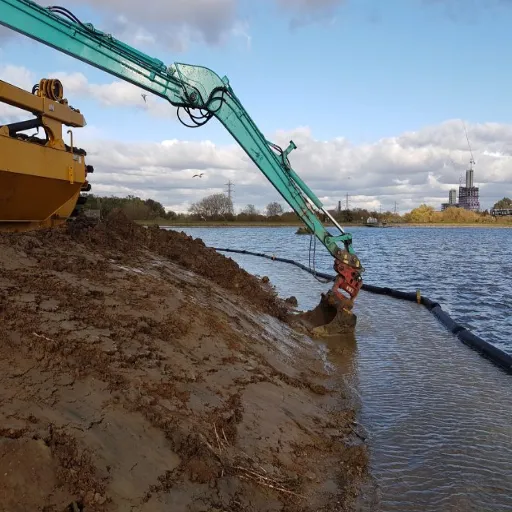
Give each finding a unique reference and retain the original entry. Add corrective actions and recheck results as dated updates. If a later inspection changes the diagnosis, explain the new evidence instead of overwriting the first observation. This makes the uncertainty and its resolution visible to the next reviewer.
Use the following blank record as a starting point, adapting its fields to the approved site procedure. The Hong Kong airport’s Silt Curtain Deployment Plan, Appendix D, includes affected locations, proposed actions, completion dates and confirmation fields. Its project-specific inspection requirements are not automatically requirements for another site.
| Record group | Fields to complete |
|---|---|
| Identity and basis | Finding ID; curtain/panel; location reference; drawing revision; inspector; inspection time |
| Conditions and coverage | Weather and water conditions; viewing method; area inspected; inaccessible or unseen sections |
| Observation | Defect description; extent observed; suspected cause labeled as uncertain; photograph references |
| Immediate response | Applicable plan trigger; controls applied; notification recipients and times; responsible owner |
| Repair decision | Approved method and revision; materials/components identified; repair or replacement; completion record |
| Reinspection | Reviewer; time; method; observations; evidence references; remaining limitations |
| Acceptance and handoff | Monitoring cross-reference where required; acceptance authority; decision; restrictions; open actions; next check |
Keep environmental results in their original monitoring record and link its reference. Avoid copying a single reading into the register without its location, time and interpretation. The defect record should let a reviewer retrieve the evidence, not create a competing set of unexplained numbers.
Make the next shift’s decision clear
Use statuses that distinguish an open observation, planned action, completed physical repair and accepted closure. Define their meaning in the site procedure. Completed work can still await a recheck, environmental evidence or approval.
At handoff, identify each remaining action, its owner, the relevant work restriction and when it must be reviewed. Preserve the earlier failure record when the issue closes. If a defect recurs, open a linked finding so repeated damage remains visible for engineering review.
Frequently Asked Questions and Closing Handoff
How often should a silt curtain be inspected?
Use the controlling project schedule, event triggers and applicable manufacturer’s instructions. Illinois Code 917 specifies at least daily checks and checks after runoff events and heavy winds within its scope. Other guidance varies. Record the schedule’s source, responsible person and required coverage; resolve conflicting instructions with the project reviewer.
Does a surface inspection prove the skirt is intact?
No. A surface view shows only the area visible from that position. It cannot establish the condition of every submerged seam, connection or skirt section. Record unobserved areas and arrange the further inspection required by the plan, using approved access methods and documenting visibility limits in the resulting report.
Can every curtain tear be patched?
No. The decision depends on the actual fabric, damage extent, affected connections and applicable manufacturer instructions. A compatible panel replacement may be the approved option. Identify the system before selecting materials, include adjacent damage in the assessment, and retain the repair instruction and reinspection evidence with the original finding.
What if a plume appears after a repair?
Follow the site’s observation and monitoring response procedure. Record when and where the plume appears, inspect the relevant curtain area and cross-reference required monitoring evidence. Do not assume the patch failed or that the water has recovered. The physical condition and environmental response need their own documented checks and decisions.
Who can clear the work to restart?
The authority named in the approved project requirements must make the applicable release decision. Completing a repair does not automatically grant restart permission. Supply the physical recheck, monitoring evidence and other approvals the plan requires, and record the decision, restrictions and any remaining actions before handing the work back.
For your next shift, use the component checklist with the current site plan and retain the signed defect-to-reinspection record. Silt curtain inspection and repair is complete only when the required evidence and acceptance decisions support the handoff.