Geogrid for gravel roads works by confining the aggregate base, then acting as a tensioned membrane once ruts start to form. That combination reduces rutting and lets a thinner layer of crushed stone carry the same wheel loads. It works best on weak subgrade. Once the ground beneath the road is reasonably strong, the grid stops changing how much stone you need.
A gravel road is the only pavement that gets consumed as it is used. Every pass of a tyre takes a little of the wearing course with it, and every grading pass moves a little more into the shoulders. If you manage a gravel road, you already know the loop. Grade it, spot-gravel it, re-gravel it every few years, and watch the same ruts return in the same places.
This guide is about where a geogrid fits into that loop, and where it does not. You will get a symptom-first diagnosis of why gravel roads fail, the placement rule that decides whether the grid works, and the subgrade threshold above which reinforcement stops paying. It also covers published per-mile maintenance costs, and the specification language that keeps a cheap substitute off the site.
If you want the full design framework behind these numbers, the geogrid for road base and gravel driveways guide covers thickness charts, bearing capacity factors, and the complete installation sequence.
Key Takeaways
- Geogrid pays on gravel roads with weak subgrade; above roughly 50 kN/m² undrained shear strength, grid stiffness stops reducing the required base thickness.
- A 2026 US field study on unpaved county roads measured up to 30% more bearing capacity, 25% more stiffness, and 10 to 20% lower moisture in the base and subgrade.
- Most gravel road failures are drainage, grading, or aggregate quality problems. A grid placed to fix a drainage problem will fail and take the blame.
- Routine maintenance on an unsealed road commonly runs between USD 4,000 and USD 7,000 per mile per year, with re-gravelling every three to five years.
- Placement decides performance: at the subgrade interface for thin bases, higher in the layer for thick bases.
Geogrid for a Gravel Road: The Short Answer

Geogrid for a gravel road helps when the road is losing its base into the subgrade. The grid restrains the aggregate from spreading sideways under load. Once deformation develops, it carries part of the wheel load in tension. The result is less rutting under the same traffic, or the same rut depth with less stone.
It does not replace drainage, a proper wearing course, or compaction.
In practical terms, the grid is doing one of two jobs. On a weak, wet subgrade it is a stabilization layer that prevents the aggregate and the soil from intermixing and punching. On a firmer subgrade it is a reinforcement layer that improves load spread and earns a modest thickness reduction.
The difference matters for buying decisions. Stabilization is where the money is. Reinforcement on good ground is a marginal purchase.
A road also carries a different mix of loads from a driveway. Farm machinery, timber haulage, quarry trucks, and service vehicles all use the same surface. They arrive in seasons when the subgrade is at its weakest. That seasonal load case, not the average daily count, usually governs whether a grid belongs in the section.
Not sure which case fits your road? Send the road length, the traffic it carries, and a description of the subgrade. We will tell you whether a geogrid belongs in the section before you buy anything. Ask our technical team.
Why Gravel Roads Keep Failing
Start with the loop rather than the product. Gravel leaves the road surface continuously. As the surface thins, the crown flattens. A flatter road holds water longer.
Water softens the base and the subgrade, and softened ground ruts under load. Rutting collects more water, and the cycle accelerates.
Grading interrupts the loop for a few weeks. Re-gravelling interrupts it for a few years. Neither changes the underlying rate at which material is lost, because neither addresses the interface between the aggregate and the ground beneath it.
The four symptoms road crews name are worth separating, because only one of them is a geogrid job.
| Symptom | Usual cause | Is geogrid part of the fix? | Do this first |
|---|---|---|---|
| Corrugation (washboarding) | Dry, poorly graded wearing course, hard acceleration and braking, inconsistent material | No | Adjust grading technique, moisture, and aggregate gradation |
| Potholes | Poor surface drainage, loss of crown, water standing at a low point | Only if the subgrade is also failing | Restore crossfall and drainage |
| Wheel-path rutting | Weak or wet subgrade, fines pumping into the base | Yes | Separate and stabilize the subgrade |
| Edge and shoulder failure | No edge support, shoulder material too weak, water at the edge | Sometimes | Widen and support the shoulder |
The US Federal Highway Administration’s gravel roads guidance attributes corrugation to lack of moisture, aggressive acceleration and braking, and poor gravel quality. It attributes potholes mainly to poor surface drainage and the loss of crown. Crossfall on a gravel wearing course is commonly specified at about 4%.
That diagnosis carries a commercial consequence. If a road is corrugating, a geogrid will bury the problem under a layer of stone. Fix the grading and the material first, then decide whether geogrid for gravel roads belongs in the section at all.
Where Geogrid Goes in a Gravel Road Base
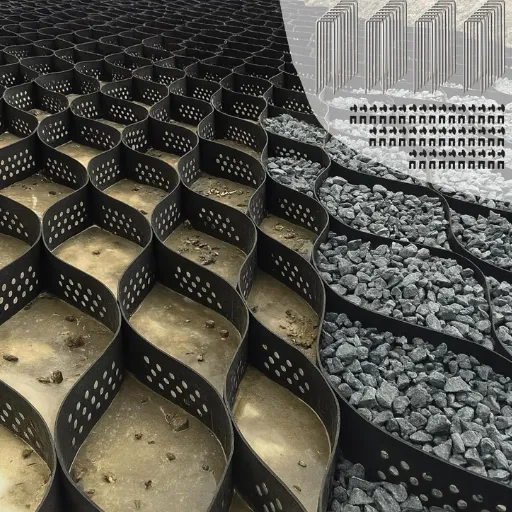
Placement is the variable most often lost on site, and it changes the result more than the grade of the grid does.
The classic laboratory work on this point is Haas et al. (1988). Its cyclic plate tests on subgrade at CBR 0.5 to 1% found that geogrid increased the number of load applications to failure by about a factor of three, and allowed base thickness reductions of 25 to 50%. The optimum position was at the base and subgrade interface for thin bases, and at mid-height for thicker bases.
The mechanism explains the rule. At the interface, the grid restrains the bottom of the aggregate layer where lateral spreading begins and the subgrade first yields. In a thick base, the critical zone sits higher up. A grid at the bottom is too far from the action.
On fine-grained subgrade, a separator is a separate decision. Between roughly CBR 3 and 8, the dominant benefit of a geosynthetic is separation, keeping fines out of the stone. Below about CBR 3 to 4, stabilization takes over. That is the framing in the FHWA ground modification manual, and it explains why the two products are not alternatives.
Use a nonwoven geotextile separator under the grid on silts and clays, with 300 mm overlaps. On clean granular subgrade with good drainage, the separator is optional and the grid alone is enough. Heavy clay needs both, and the layered fix for that case is set out in geogrid for driveway clay soil.
Field evidence supports the moisture argument as much as the structural one. A 2026 study at Iowa State University built three full-scale test sections on unpaved county roads in Buchanan County, Iowa, and monitored them under heavy truck and farm traffic across seasons.
The composite geosynthetic, a recycled-plastic geogrid bonded to a nonwoven, increased bearing capacity by up to 30%. It improved stiffness and elastic modulus by 25%, and cut moisture in the base and subgrade by 10 to 20%. The published abstract reports that the recycled version matched the virgin-plastic equivalent.
Iowa alone maintains more than 71,000 miles of granular county roads. Across a network, a 10 to 20% moisture reduction affects spring load restrictions and re-gravelling frequency more than it affects any single design thickness.
Design by Road Class, Not by Driveway
A gravel road is not a long driveway. Three things change the design.
Traffic is seasonal and heavy. A farm access road may see 20 vehicles a day for most of the year and then 40 loaded grain trucks in a week. A quarry road sees axle loads that would destroy a residential drive. Design for the heaviest regular load, in the wettest season, not the annual average.
The owner is an organisation, not a household. A council, forestry company, estate, or mine maintains a network and holds a budget line. The decision is made against a maintenance forecast, not a single project cost.
The road is maintained under traffic. You cannot close it for a week. Work happens in half-widths, in stages, and often in the season when the ground is least cooperative.
In cold regions, spring thaw is the season that matters most. A frost-susceptible subgrade loses much of its strength for several weeks, and that is when the heaviest damage appears. Geogrid frost heave is a separate design question: a grid spreads load and thins the section, but it does not stop ice lens growth. Check that before you assume reinforcement covers the thaw.
In practice, geogrid for unpaved roads is specified across five classes:
- Low-volume rural road, under about 50 vehicles per day, graded by the owner two to four times a year.
- Agricultural or farm road, light most of the year, with seasonal heavy machinery and harvest traffic.
- Forestry or access track, heavy short-wheelbase vehicles on soft ground, often steep.
- Quarry or mine access road, continuous heavy axle loads, and a different design case entirely.
- Municipal unsealed network, many kilometres, a fixed budget, and a formal asset condition rating.
Thickness follows from subgrade strength and traffic, and the charts belong in a design guide rather than in a supplier page. As a directional rule, the thinnest covers apply to firm, well-drained subgrade and the thickest to soft, wet ground. The whole range shifts up for heavy seasonal loads. The road base guide linked above carries the CBR-based thickness tables if you need them for a specific section.
One boundary is worth stating plainly. A working platform or a mine haul road on very soft ground is a different problem with different design assumptions, and it is covered in the guide to geogrid for soft ground and working platforms. A rural gravel road rarely justifies that level of section.
When Geogrid Does Not Pay
This is the part most suppliers leave out, and it decides whether geogrid for gravel roads is defensible to a budget holder.
In a parametric analysis of the Giroud and Noiray (1981) unpaved road design procedure, geogrid tensile stiffness had no effect on the required reinforced base thickness once undrained shear strength exceeded about 50 kN/m². Below that threshold, stiffness mattered, and stiffer grids gave thinner sections. Above it, the subgrade could carry the traffic on its own, so the reinforcement had nothing to do.
The same work found that the two leading design models, Barenberg et al. (1975) and Giroud and Noiray (1981), land in a reduction band of roughly 30 to 34% under their own conditions. That is a range, not a promise. It depends on the subgrade, the traffic, and the allowable rut depth, and the full thesis sets out the method.
So here’s the honest test. If the subgrade is firm, well drained, and above roughly 50 kN/m² undrained shear strength, a geogrid is a convenience, not a fix. Spend the money in this order instead:
- Restore crossfall and clean the side drains.
- Fix the wearing course material and its gradation.
- Compact the base properly, in lifts.
- Undercut and replace isolated soft spots.
- Then consider reinforcement, on the sections still failing.
Four expensive mistakes follow from skipping that order:
- A grid under a drainage problem.
- A grid buried in rounded or single-size stone that can’t interlock.
- A grid without a separator on fine-grained ground.
- A grid spread across a whole road when only two sections were ever weak.
The farm road with two soft spots is the clearest case. Picture a 4 km access road serving a mixed farm. Most of it is sound gravel over sandy subgrade, and two sections turn to slurry every spring. Stabilizing the whole length would cost four times what the problem warrants. Reinforcing those two sections, and leaving the rest alone, keeps the budget honest and the road passable.
What Stabilization Costs, and What It Replaces
A road manager holds two budgets. Routine maintenance covers grading, spot graveling, dust control, and drainage repairs. Periodic maintenance covers re-gravelling or resheeting. Geogrid for gravel roads competes with the second budget and reduces pressure on the first.
Published agency figures give the order of magnitude. Work reported for MnDOT in 2005 put grading at about USD 1,400 per mile per year across roughly 21 passes, re-gravelling at USD 13,800 per mile every five years, and average annual maintenance at about USD 4,160 per mile. A South Dakota study from 2004 recorded grading about 50 times a year, re-gravelling every six years at USD 7,036 per mile, and spot graveling at USD 2,420 per mile, for roughly USD 6,843 per mile per year.
Those are US figures from two decades ago, and current local prices vary enormously. The pattern is what matters. Routine grading, not stone, is the largest recurring cost on an unsealed road. Re-gravelling cycles of three to five years are typical internationally, and shorter in high rainfall or on steep grades.
Here’s the arithmetic a business case needs, using round numbers and one mile of road:
| Line item | Unreinforced | Stabilized |
|---|---|---|
| Base depth required | 300 mm | 200 mm |
| Aggregate at USD 30/m³, per mile | ~USD 48,000 | ~USD 32,000 |
| Geogrid at USD 0.60/m², one mile | nil | ~USD 1,500 |
| Separator geotextile, if needed | nil | ~USD 1,200 |
| Net material difference | baseline | about USD 13,000 saved |
| Grading frequency over 10 years | 20 passes | 15 passes |
| Re-gravelling over 10 years | 2 cycles | 1 cycle |
The saving is real, but it depends on the base reduction being achievable. Where the subgrade is already firm, the 300 mm section may be more than the road needs, and the reinforcement saves nothing because there was nothing to remove.
Material pricing for the grid is covered in the geogrid cost per square metre reference, which breaks the range down by grade and polymer.
For a network, the useful framing is cost per mile of road converted against the maintenance it displaces. A council that re-gravels 30 miles a year will get more from stabilizing the worst 5 miles than from spreading the same budget across all 30.
Building It on a Real Road

Three situations produce three different jobs: a new build on prepared subgrade, a retrofit on an existing road, and a staged reconstruction under traffic.
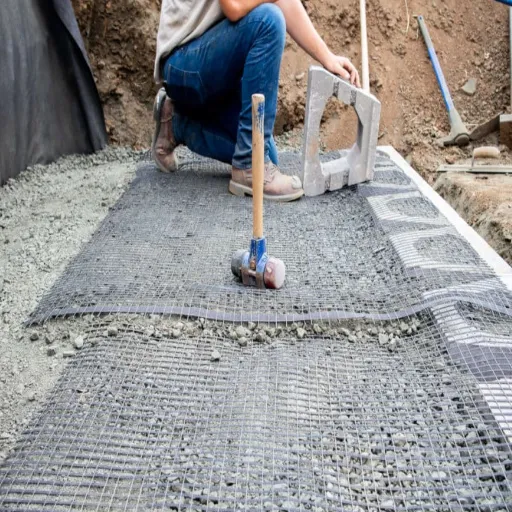
For a new build, follow the sequence in the geogrid installation guide. Strip, proof roll, undercut soft spots, and place a 100 to 150 mm bedding lift. Then roll out the grid, pin and overlap, and cover it before anything drives on it.
Retrofit is harder, because the surface has to be shaped first. Scarify and reshape the wearing course, restore the crown, then place the grid on the exposed base. If the base is contaminated with subgrade fines, the grid won’t fix it and the section needs reconstruction.
Long pulls lose benefit in ways a driveway never does. Roll the grid perpendicular to traffic and pull it taut over the full panel length. Stagger the panel ends so no two seams line up across the carriageway.
Overlap according to ground condition: about 300 mm on firm ground, rising to 600 mm or more on soft ground. One published guide ties overlap to subgrade strength, at roughly 900 mm at CBR 1 or below and 300 mm at CBR 4 or above.
Cover matters most on a trafficked road. No vehicle should drive on exposed grid, including the truck that brought the stone. A Washington State specification is unusually explicit. It requires overlaps of at least 2 ft (about 600 mm) and lifts over 8 in (200 mm), with compaction by a 10,000 lb vibratory roller in three passes. It bans tracked-equipment turning on the grid.
These are the five failures that most often remove the benefit:
- Grid left exposed and driven over before the first lift.
- Stone tipped onto the grid from a height, tearing the panels.
- Panels wrinkled rather than tensioned, so the grid works only after the road has rutted.
- Seams aligned in one line along the wheel path.
- Compaction done in one thick lift instead of thin layers.
The guide to geogrid failure modes goes through each with the inspection that catches it.
Specifying It So It Survives Procurement
A specification is only useful if it survives the substitution that happens between award and delivery.
Specify by tensile stiffness at 2% strain, not ultimate strength. Two grids with the same ultimate tensile strength can behave very differently in service, and stiffness governs how much the aggregate is restrained at working load. That one clause does more for a road than any brand name in the document. Add junction efficiency, which tells you how well the ribs transfer load at the node, and match the aperture to the aggregate: the mid-size particle should sit comfortably in the opening so the stone can interlock.
Ask for three documents with the quotation:
- A third-party tensile test report to ASTM D6637.
- A product certificate with the manufacturing lot.
- A method statement covering overlap, cover depth, and compaction.
Then close the substitution risk in the wording. State the required stiffness value, name the test method, and require written approval for any alternative. The most common substitution is a separator geotextile offered as a geogrid, which is a different product doing a different job.
Three hold points catch almost every site failure. Check the grid is tensioned and lapped before the first lift is placed. Check no vehicle has trafficked the exposed grid. Check the compacted lift thickness and density before the next layer goes down.
Send us the road and we will size the grid. Tell us the road length, the traffic it carries, a description of the subgrade, and the stone you can get locally. We will recommend a grade and a base depth, and quote it. Request a technical quote.
Frequently Asked Questions
Does geogrid work on a gravel road?
Yes, on weak or wet subgrade. Geogrid for gravel roads confines the aggregate and adds membrane support once ruts form, which reduces rutting and allows a thinner base. On firm, well-drained ground above roughly 50 kN/m² undrained shear strength, it makes little difference to the required thickness.
How much gravel goes over geogrid on a road?
At least 100 to 150 mm of compacted cover, and more where traffic is heavy or the subgrade is soft. Place it in lifts of 150 to 200 mm rather than one thick layer. The full calculation is in our guide to how much gravel over geogrid.
Can you put geogrid on an existing gravel road without rebuilding it?
Sometimes. If the base is clean and the failures are localized, the road can be scarified, reshaped, and rebuilt in sections with a grid. If the base is contaminated with subgrade fines or the whole length is failing, partial reconstruction is the honest answer.
How much does it cost to stabilize a gravel road per mile?
It depends on base depth, aggregate price, and grid grade, but the grid itself is usually a small share of the section. The saving comes from reducing base thickness and from stretching the interval between re-gravelling cycles. On soft ground both effects can be large; on firm ground neither may appear.
Will geogrid stop potholes and washboarding?
Not reliably. Corrugation is usually a wearing-course and grading problem, and potholes usually follow drainage and loss of crown. Fix those first. A grid helps where the surface failure is being driven by a weak subgrade underneath.
What geogrid grade for a low-volume rural road?
Biaxial polypropylene in the region of 20 to 30 kN/m is the common starting point, selected on stiffness at 2% strain rather than ultimate strength. Heavier traffic or softer ground pushes the grade up, and the grade should follow the design, not the catalogue.
The Bottom Line
Geogrid for gravel roads is a maintenance tool, not a surface treatment. It works by changing what happens at the interface between the aggregate and the ground, and it earns its cost where that interface is failing.
Three things decide the outcome. Diagnose the symptom correctly, because drainage and grading problems are not reinforcement problems. Place the grid where the failure starts, at the interface for thin bases and higher for thick ones. And check the threshold: on subgrade above roughly 50 kN/m² undrained shear strength, the money is better spent on crossfall, material, and compaction.
Where the subgrade is weak and the re-gravelling cycle keeps returning, the arithmetic usually works. Field evidence on real gravel roads shows measurable gains in bearing capacity and stiffness, plus a moisture reduction that matters as much as either. Across a network, that’s the difference between a road you rebuild every spring and one you maintain.
If you’re weighing stabilization against another re-gravelling cycle, send us the road details and we’ll tell you honestly whether a geogrid belongs in the section. Request a technical quote and we’ll come back with a grade, a base depth, and the numbers behind both.